There are two most important aspects of a bike trip. The first is planning & preparation and the second one is packing. Together, these two will determine whether your ride was a success or failure. As long as you were well prepared and had everything you needed; you will be able to handle any problem on the way and your ride will remain smooth. In the previous article, I provided details on how to prepare for a bike trip. Continuing in the same series, in this post, I will talk about packing for long distance motorcycle trip.
I have been doing bike trips for almost 12 years now. Some of the rides lasted for as long 3-4 weeks and some were just quick weekend getaways. One thing that I have come to learn out of them though is that a bike ride is both a fun and a risky affair. It is a vacation and an adventure at the same time where a million things can go wrong.
A common misconception among people is that a bike trip is the same thing as riding a bike on a daily basis in the city. This is not true at all. There is a ton of difference between riding a motorcycle on city roads, without any luggage for a couple of hours at most; and riding one on the highway, loaded with luggage for long hours.
Also Read: Necessary Tips for Long Distance Motorcycle Riding
The latter one is not everyone’s cup of tea and a lot of preparation goes into getting yourself and your bike ready for the trip ahead. You would have to be ready both physically and mentally. Being on the road for several hours day after day is going to take a toll on both you and the machine.
Quick Navigation
Essentials for Long Distance Motorcycle Rides
The only way that you can ensure that your trip goes hassle-free and you return home safely is by carefully planning every aspect of the ride.
Get your Bike Serviced
Irrespective of what condition your bike was in, you must bring it to a mechanic or service center for a complete check-up; and you will need to get this done at least 7-10 days in advance. If it has been a while or around 2000 kilometers since the last service then you should get it serviced again. Otherwise, get it checked thoroughly and replace or repair whatever seems dicey.
After you are done with the servicing, ride around for a few days in the city to ensure that everything was working as per the expectations.
When you are at the mechanic, also learn a few minor repairs and tweaks, like increasing pick up, checking for oil, etc. You will not find a mechanic everywhere and should know how to run a few checks or take care of some minor things yourself.
Also Read: How to Prepare your Motorcycle for a Ladakh Trip
Packing for Long Distance Motorcycle Trip
When packing, there are two things that you will have to pay close attention to. The first is what to pack and the second is how. Depending on how long your ride will be and how space you have, you will need to ensure that you bring in everything you will need; but at the same time, you also cannot bring in just about everything. You will carefully need to decide which ones are the most important items that you will surely need during the ride.
Secondly, you will also need to decide and balance out between items of personal use and bike accessories like spare parts, puncture repair kit, and foot pump. All of this luggage will have to get loaded on the same motorcycle and you will need to carefully evaluate how much you can actually carry.
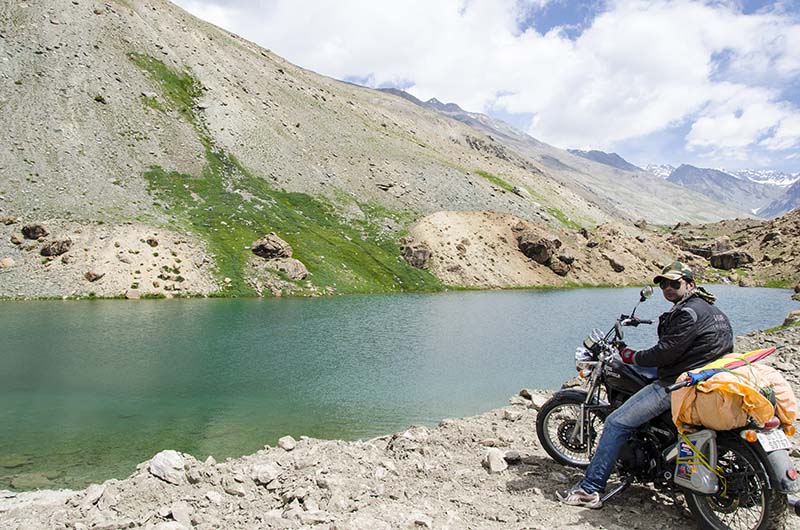
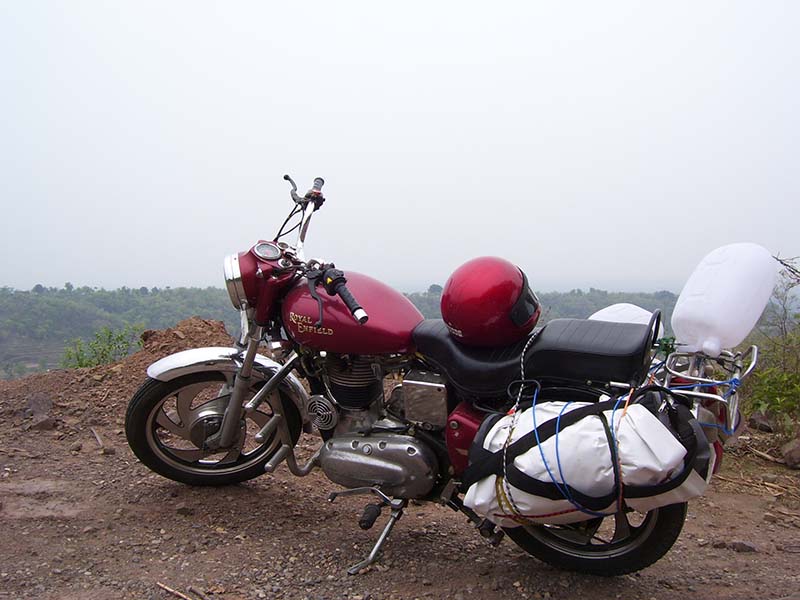
Next will be how to fix your luggage on the bike properly. The weight of the bags must be evenly distributed on the bike and securely tied with ropes or bungee cords. A good luggage carrier can make things a lot easier, especially if you were also carrying spare fuel.
Let us take a look at this information in more detail.
Packing List for Bike Trip
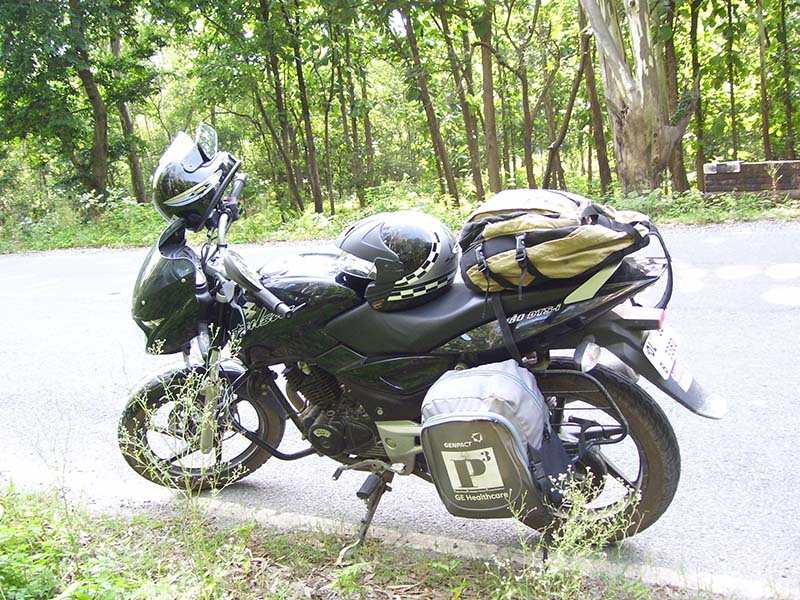
Your packing list can be broken down into three parts. First are the items that you will need on a regular basis, the ones that you will have to keep handy. This will include your wallet, license, documents, phone, camera, water bottle, map, itinerary etc. For this, you will have to decide a bag and spot that is easily reachable; and will not need you to untie the entire luggage off the bike. A light shoulder bag can be a good choice.
Second will be the items that you can just pack for the day; and will not have to worry about until you reach the next destination. Your clothes or other personal items will fall in this category. These you can just put all in your bags and rope them on the bike.
Third category will be of spare parts and accessories that you will need to carry for the bike. These will be a little hard to pack as it will include heavy and pointy items as well as fluids and fuel. This is where a luggage carrier can come in handy. It is balanced on both sides of the bike and also has separate slots for carrying fuel cans.
I will also recommend packing a first aid kit. From my own personal experience, I can tell you that it can sometimes be a life saver. No need to go crazy about it though. Just keep some basic medicines like for flu, upset stomach, fever, body ache, an anti-septic lotion like Dettol, pain relief balms or spray and some bandages. Do not also bury it deep inside your luggage and keep at a place that is easily reachable during the ride.
Also Read: Ladakh Checklist – Things to Carry for Ladakh Trip
Spare Parts and Tools
Why do you need to carry spare parts? It is because sometimes, you may find a mechanic but spare parts will be even harder to find; especially when you were planning to go remote. It has happened with me a few times when something as easy as a clutch cable left us stranded in a mechanic’s shop for an entire day and night till he arranged for it the next day.
What items do you need to carry? Nothing heavy but just some basic items like cables (brake, accelerator, clutch), spare bulb, Oil, fuses, spark plug and chain locks.
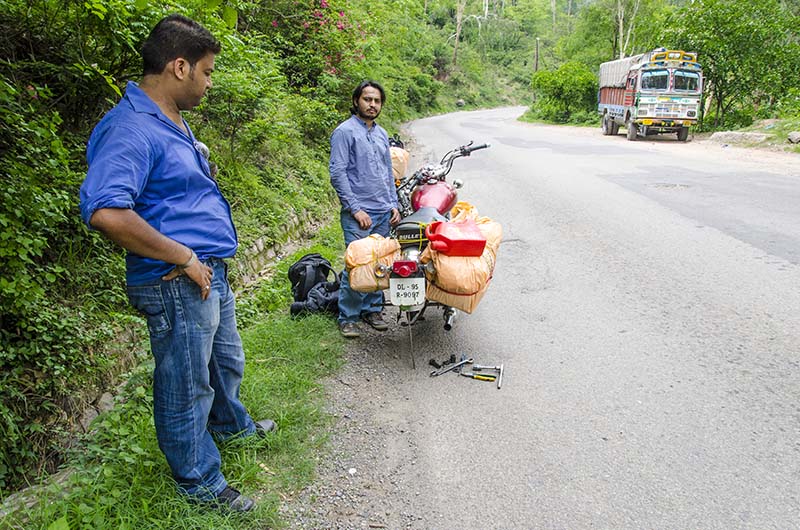
Another important item is a puncture repair kit and a foot pump. If your motorcycle wheels were running on tubes then a wise choice would be to carry 2-3 spare tubes. This way, you will not have to worry about fixing the puncture. Just take the wheel out, change the tube, and put the wheel back on. In the next town, you can just get the punctured tube fixed and keep it in your luggage as spare.
If you were riding a bike with tubeless tires and encountered a flat, just keep pumping enough air back in to make it to the next repair shop.
Every bike has its own set of tools, a tool kit, which is absolutely necessary for you to bring. If your motorcycle does not have it then you must buy a new one.
You must also learn a few minor repairs yourself, specially fixing a puncture. If you had a flat tire in the middle of nowhere, a repair kit will be of no use unless you know how to take the wheel out and fix the puncture or replace the tube.
Total Weight
The next thing that almost everyone misses on is calculating the total weight you are going to put on the bike. This will be a total of your own weight, the weight of the pillion rider (if you had one), and the weight of the luggage.
Why are we calculating this? Because every motorcycle has a GVWR (Gross Vehicle Weight Rating). This will tell you the maximum total weight that you can put on that particular bike. It is much like an elevator where you see the maximum number of people allowed at a time. On the bike, it is the maximum number of weight that you can put on it safely.
For most bikes, you can safely load about 200 kilograms. If you were riding a larger engine bike (500 CC or higher), then this weight can go a little higher but it is not really only about the engine power. It is also about how much weight you can put on it without risking breaking anything. To be on a safer side, I will not recommend going any higher than 200 kilos (your own weight included).
Please note that if you were riding a small engine bike like 100 CC or 125 CC, then this weight will be much lower. With a bike like that, it is strongly recommended that you ride solo.
Also Read: How to send your Motorcycle by a Train
Bungee Cords or Rope
One of the most commonly asked questions is whether to use a rope to tie the luggage or a bungee cord. My advice would be that you use both. I know that it will be added work and will take a bit of effort and time; but will ensure that your entire luggage is securely tied.
There are two types of bungee cords available in the market, round and flat. I have used both and found the flat ones to be more durable and long-lasting. But as long as you are buying a good quality cord, either one will do. You can get it online or any sports store like Decathlon.
I have used several kinds of bungee cords. The thing with them is that the hook can give away anytime, especially when it is supporting heavy luggage. Even the most expensive ones have ditched me in the middle of the ride several times and that is why I do not entirely rely upon them.
To be on a safer side, I first use bungee cords to mount the luggage on the bike, and then I use a nylon rope to secure it even more. It is just an added layer of protection for peace of mind. The rope takes the stress of the cord so the chance of it snapping gets reduced.
This way, In case the rope came undone, the cord will still hold the luggage. If the cord snapped, the rope will keep it in place. Trust me; you do not want your bags coming lose when you are riding at 90 kmph on a highway.
How to Mount your Luggage on the Bike
Now that you are all set and prepared, let us take a look at some key points to remember while mounting the luggage on the motorcycle.
- As I mentioned above, getting a luggage carrier installed will be a wise thing to do. It is not absolutely mandatory but can make things a lot easier for you if you can manage to get one.
- Distribute the weight evenly on the bike on both sides. Do not allow any of the sides to be heavier than the other for a comfortable ride.
- If you got a rear carrier installed behind the pillion seat, do not put anything heavy on it; because it will disbalance the bike. You may put something light on it; but everything heavy must go either on the sides or on the pillion seat.
- Wrap your bags in a poly cover or tarpaulin first and then mount them on the bike. This will keep them safe from dust, mud, or water. A lot of people first load the luggage and then cover all of it with a sheet but I prefer wrapping the bag itself to be on a safer side.
- Make sure the jerry cans you are carrying for fuel are strong and won’t break easily.
- Use Bungee cords to load the bags and then secure them with a nylon rope.
Also Read: Which is the Best Motorcycle for Ladakh Trip
Personal Identification
You should keep your wallet, driving license, bike documents and cell phone in a place where you can reach it quickly if needed. If you had a medical history, then I will recommend writing it down on a piece of paper; details like your blood group, allergies, prescribed medicines, etc; and keep in your pocket where it can be easily found by someone in times of emergency.
Otherwise, just write down your address, emergency contact number, and keep that in your pocket. Do not save it on your cellphone but write on an actual piece of paper and carry it in your pocket every day.
Protective Balms
Also, keep a sunscreen lotion with high SPF and a lip balm handy and keep applying at regular intervals. All the constant dust and heat will take a toll on your screen and you must protect it.
Keep your Stuff Dry
I know I previously said that you should wrap your bags in a plastic cover before loading them; but another safe practice to keep your items dry is to line your bags with plastic sacks. Either keep a large plastic cover in the bag and put your stuff in it; or first wrap your stuff in small plastic covers and then keep them in the bag.
What If
Finally, there will definitely be something that you will forget to bring. I think it happens with all of us. We start the ride and then suddenly we think of something that we thought we will bring but forgot to pack. Don’t stress too much about it though.
When it comes to personal stuff, my recommendation will be to take half the clothes and twice the money you think you’ll need. You are not riding into the unknown. There will still be civilization around and shops that you can buy stuff from.
Packing for Long Distance Motorcycle Trip – Conclusion
I hope the information above on packing for packing for long distance motorcycle trip was of help. If you have any questions or need any other details, please feel free to ask in the comments section below, or at our Community Forum, and I will be glad to answer. If you have some other tips you will like to share with others, do kindly mention in the comments.


