
We have learnt so far that Photoshop has a long list of Blend modes divided into six different categories based on the effect they create when applied. First category is basically an uncategorized list comprising of Normal and Dissolve modes because these two do not fit into any other category. Second category is of Darken modes named such because all these modes create a slight darkening impact on the image. The first blend mode Darken in this category has the least impact while the later modes like liner burn and color burn have the greatest impact. In this tutorial, we will understand the “Multiply” blend mode, second one in the blend mode category.
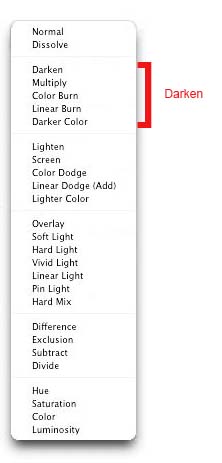
Even though Photoshop offers a long list of Blend modes which keeps on getting even longer with every latest release, truth is that only a handful of these blend modes are used most of the times. It is agreed that every blend mode has its own unique effect but you will find as you start using Photoshop more often that for your basic editing and day to day work, you only need to know a few. There are really just one or two blend modes in every category which can be considered as big or major and this assumption is based on how often people find use for it.
Our next blend mode, as I mentioned above, in the darken category is “Multiply”. It not only stands above the other four modes in this category but is also one of the most important and widely used blend modes in all of Photoshop, so yes, you can also call it as a “must know” blend mode. I mentioned in my earlier tutorials that Photoshop actually performs a math for every blend mode listed but multiply is the only mode which is named after the actual math. The effect of this mode, when applied, will result in a darker image due to which it is listed in the darken category. Let us first take a look at the official definition of this mode as listed on Photoshop’s official site. As per Adobe, “Multiply Looks at the color information in each channel and multiplies the base color by the blend color. The result color is always a darker color. Multiplying any color with black produces black. Multiplying any color with white leaves the color unchanged. When you’re painting with a color other than black or white, successive strokes with a painting tool produce progressively darker colors. The effect is similar to drawing on the image with multiple marking pens.”
Let me break it down what it really means in very simple words. Let us assume that you have a document open with two layers. If you changed the blend mode of the top layer to multiply, Photoshop will multiply the colors of that layer with the colors of layer or layers beneath it. Once that is done, the result will be either of the following,
- Any pure white pixels in the upper layer that have a pixel of a different color directly beneath it will get replaced by the pixel of the lower layer and vice versa. Why? Because white is considered as the lightest color tone so when Photoshop multiplies it with the color beneath, the result will be replacement of white with the multiplied color. However, if the pixel on both the layers is pure white, nothing will change because white multiplied by white remains white; it doesn’t get any lighter or darker.
- Any pure black pixel in the upper or lower layer that has a pixel of a different color directly beneath or above it will remain unchanged. Black is considered as the darkest color tone so multiplying it with any other color in order to get a darker color, even black for that matter, will result in no change at all. So even if the pixels on both layers are black, no change will occur.
- If the colors of the pixels in the upper layer and the lower layer are exactly the same and other than black or white, result will be a slightly darker color. Why? Multiply red with red and you will have a darker red.
- If the colors of the pixels in the upper layer and the lower layer are different and other than black or white, the multiplication will present a new color but of a darker tone. It’s like you mix green and white together and you have an entirely different color in your hands.
Even though it is not really required but if you must know, the mathematical and technical background of this mode is as follows. As I said, you do not really need to know or remember it, I am just mentioning it here for information’s sake. Just remember what I mentioned above and you are good.
“ The formula that Photoshop uses for Multiply mode is
f(a,b) = ab, where a is the base layer value and b is the top layer value.
This mode is symmetric: exchanging two layers does not change the result. If the two layers contain the same picture, multiply blend mode is equivalent to a quadratic curve, or gamma correction with γ=2. (For image editing it is sometimes more convenient to simply go to the Curves dialog of the software, as it gives more flexibility in the shape of the curves. Or one can use Levels dialogue — the middle number is usually 1/γ, so one can just type 0.5.) If one layer contains a homogeneous color, for example the gray color (0.8, 0.8, 0.8), multiply blend mode is equivalent to a curve which simply is a straight line. This is also equivalent to using this gray value as opacity when doing “normal mode” blend with black bottom layer.”
Source: Wikipedia
OK, that is quite enough with the theory. Let us take a look at couple of examples for better understanding. I created the following two documents for explanations.

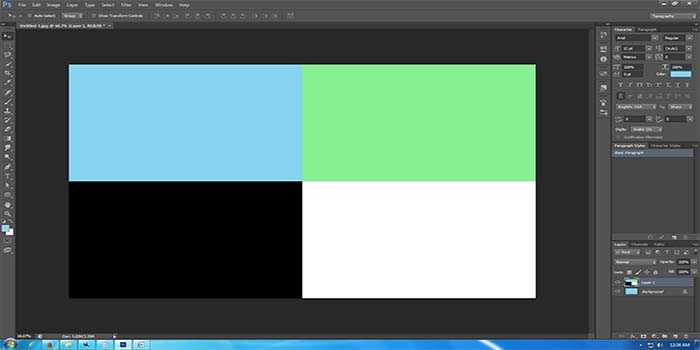
Document 1

Document 2
The first document is completely filled with a light blue color whereas the second document has four different color blocks in it. The first block is exactly the same color as in document one, the second block is a different greenish color, third block is pure black and fourth block is pure white. I have them both open in Photoshop on the same document with blend mode still as Normal.
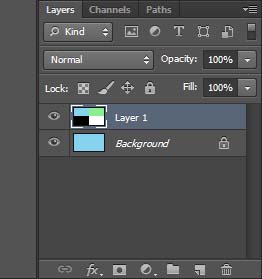
My blue document is currently my background layer whereas the second document with four different blocks is sitting on top of it on Layer 1. Since the blend mode right now is normal which means no blending at all, my background layer is completely hidden under layer 1. All I see on my screen is the four blocks layer.
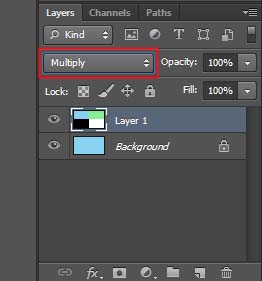
Now let us change the blend mode of Layer 1 to multiply.
The change in my document after applying the multiply blending mode is the following image.

Since the color of block one was same as the background layer, it resulted in a darker blue after Photoshop multiplied it. Block two had a greenish color while the color on background layer was bluish and hence our result color is a different tone with both greenish and bluish effect to it. Third block was pure black so after Photoshop multiplied it with the blue color underneath, it made no difference. Black remained black and nothing changed. Fourth block was pure white and after multiplying it with the blue tone of background layer, the white pixels completely got replaced with blue pixels. I will post both the documents together for comparison.
Document 2
After applying Multiply blend mode
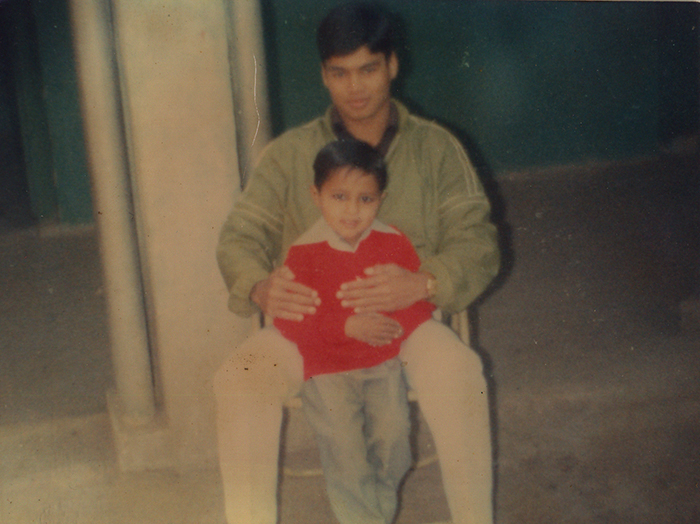
I hope this helps clarifies what effect the multiply blending mode creates on colors in images. Now let us take a quick look at how we can use it on our day to day images. I have the following image open in Photoshop which as you can see is a very old photograph that I scanned into my computer. The colors are washed out, contrast is gone, details are reduced and the picture looks very dull and gray. One of the uses of multiply blend mode is to easily darken colors in a photo that have faded over time.

Original Image
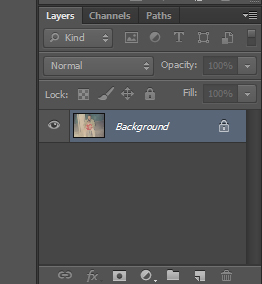
My layers panel currently has just the background layer on which this image sits.
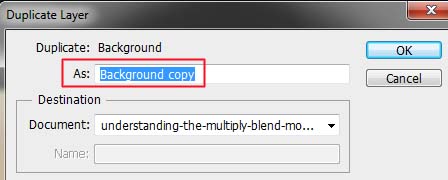
As we already know that we need to have at least two layers to use a blending mode. I will create a duplicate of my background layer and then change the blend mode of the new layer to Multiply. There are two ways to create a duplicate copy of an existing layer. One is to go to the layer menu at top of the screen and click on Duplicate layer.

Photoshop will throw the Duplicate layer dialog box asking me to rename the layer if I want to. Since I am not really working with multiple layers right now and it is just one layer I need to add, there is really no need to rename it. I will click OK without typing in a name and Photoshop will add another layer, an exact copy of the background layer on top of it.
Another way, the quicker one, is to just press “Ctrl + J” on your keyboard and Photoshop will create a duplicate of the selected layer.
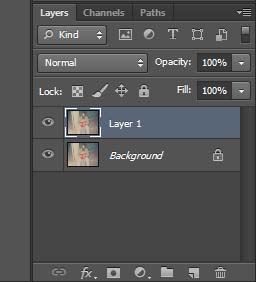
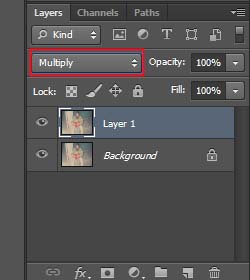
Nothing would seem to happen as the blend mode is still normal. So I will go to the blend mode field and change the blending of my duplicate layer to multiply.
And here is the result. I will post both images for comparison. First one is the original image and second one is after we added a background copy using the multiply blend mode.
Original Image
After applying Multiply blend mode
As you can see, this darkened the image a little. Colors are a little deep and there is a slight increase in contrast as well. Photoshop multiplied the colors of the duplicate layer with the color of background layer and it helped boost them a bit.
You can also use this exact same technique to darken and restore details in pictures that are a little overexposed or are missing details, for example if the sky looks a little too white. Here is an example. The first picture is the original image and second one is after I followed the exact steps mentioned above, that is to add a duplicate layer and changed blend mode to multiply.
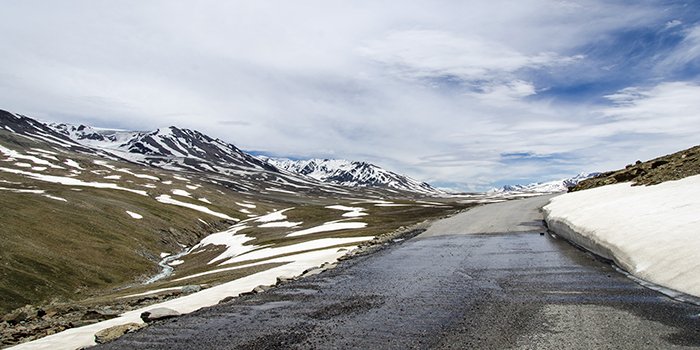
Original Image

After creating a duplicate layer and applying Multiply blend mode
These are just a couple of example of how powerful and useful the multiply blend mode can be and why it is listed as one of the must know blend modes of Photoshop. You can easily use this mode to add more details in old faded or overexposed photographs and the list doesn’t really end here.
In the next tutorial, we will look at the “Color Burn” blend mode which sits next in the darken modes category.