We will now move on to our sixth blend mode in the contrast category, Pin Light.
Like the previous blend modes in contrast category (with the exception of overlay), even pin light blend mode works on the math of blend color being lighter or darker than 50% grey. Photoshop defines this blend modes function as,
“Pin Light replaces the colors, depending on the blend color. If the blend color (light source) is lighter than 50% gray, pixels darker than the blend color are replaced, and pixels lighter than the blend color do not change. If the blend color is darker than 50% gray, pixels lighter than the blend color are replaced, and pixels darker than the blend color do not change. This is useful for adding special effects to an image.”
I know this definition kind of sounds a little tricky, almost as if someone made an error while typing it. Let me break it down in simple words. When you apply the pin light blending mode, Photoshop will,
1. Start replacing the colors depending on the blend color. Make note that I said replace, not dodge, burn or multiply. It will actually replace the pixels.
2. If the colors of the blend layer are lighter than 50% grey, pixels darker than the blend color will be replaced however no change will be made if the pixel on the base layer is lighter than the blend layer.
3. If the colors of the blend layer are darker than 50% grey, pixels lighter than the blend color will be replaced however if the pixel on the base layer is darker than the blend layer, no change will occur.
Confused still? Let me try explaining it again with the help of an example. We will use the following two documents.
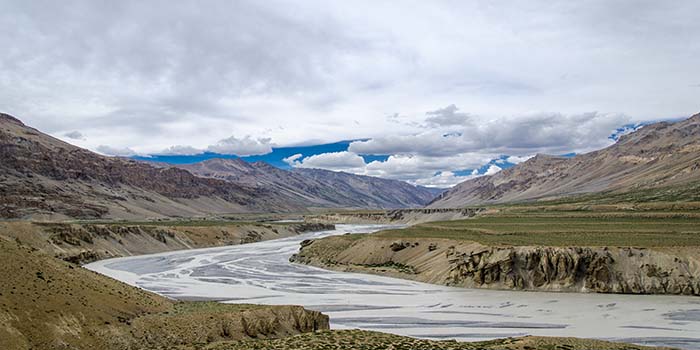
The first image is a simple shot I took with my Nikon DSLR. Second one however is a gradient image transitioning from black to white or vice versa, top being pure black and bottom being pure white. Within the gradient we have different shades of grey and it is safe to assume that the pixels in the lower half are lighter than 50% grey and in the upper half they are darker than 50% grey.
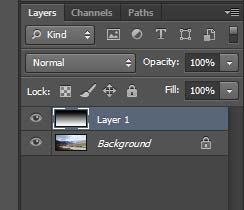
I have both these opened in the same document in Photoshop. My image currently sits on background layer while the gradient is on layer 1.
Based on what we have learned from the definition above, if I changed the blend mode of Layer 1 to pin light, Photoshop will break the pixels of my blend layer in two categories. First category is of pixels lighter than 50% grey which would be the lower part of the gradient and second category would be of pixels darker than 50% grey which is the upper part of the gradient. For,
1. Lighter than 50% grey: it would compare the pixels of the blend layer and base layer and display the one that is lighter in tone.
2 Darker than 50% grey: It would compare the pixels of the blend layer and base layer and display the one that is darker than tone.
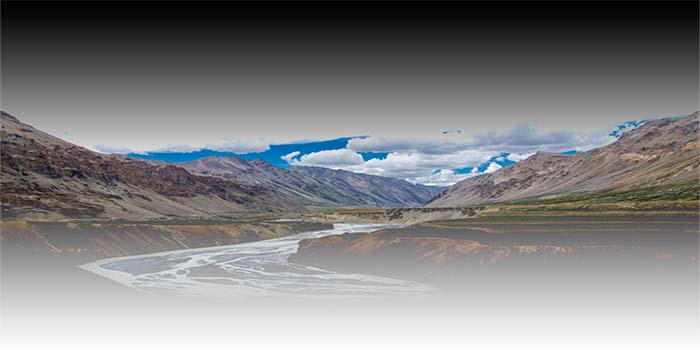
Quite simple, isn’t it. Now let us change the blend mode of our layer 1 and we got it right so far.
And we sure did. Notice how the pixels of the image completely disappeared towards the top and bottom because those tones on the blend layer were the darkest and lightest. For the middle part of the image, Photoshop made a comparison and depending on whether the pixel of blend layer was lighter or darker than 50% grey, it chose to either display the blend layer pixel or a pixel from the base layer.
Now the big question here is how and when do we use the pin light blending mode. Due to the unique way that it functions, it is often considered a favorite for producing special effects in an image. Let us take a look at another example.
I will use the following two images. The first one is a simple shot of a little girl and the other one is a light bokeh. I opened them both in Photoshop in the same document. The image is on background layer and the bokeh on layer 1.
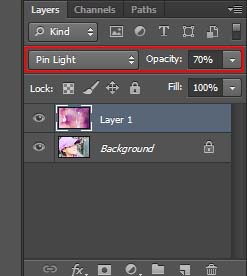
I change the blend mode of layer 1 to pin light and lower the opacity down to 70%.
And here is the final result. Nothing too great but a very simple light effect added to the image.
This is all for ping light blending mode. In our next tutorial, we will understand the last blending mode in the contrast category, Hard Mix.

