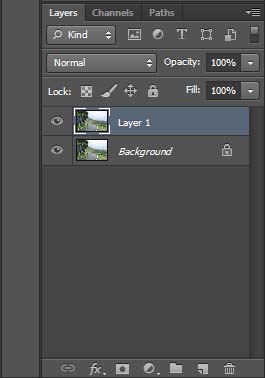
In Previous Tutorial, we had a brief introduction with what Layers are and how working with them can make our work in Photoshop so much easier. However so far we only understood the concept of layer or in a way barely scratched the surface. In order to fully understand how layers work, we will now look at the Layers panel where we make all the changes in layers.
Known as the Layers Palette in earlier versions of Photoshop, the layers panel is where we manage all our layers and by manage I mean, create them, delete them, add effects, merge them and do so much more. The layers panel is probably one of the most commonly used panels in Photoshop. In this tutorial, we will see what the different areas in layer panel are as well as how we can make some very basic changes to the layers. We will take a brief overview of the Layers panel so we know how to access the different available functions. Some of these functions are so vast that they need a separate tutorial of themselves. For now, we will just see where these functions are located and learn about these functions in details in later tutorials.
Open an Image in Photoshop. You will find the Layers panel towards the right hand corner of the screen, under the heading “Layers”. Irrespective of which version of Photoshop you have, this is always where the Layers Panel is located.
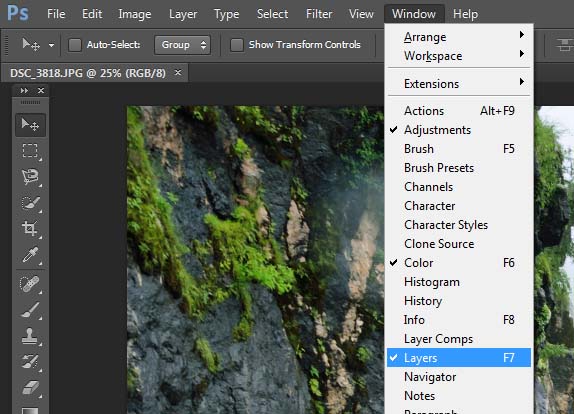
If for some reason, Layers Panel is not displayed by default, you can do so manually by pressing F7 from your keyboard or by going up to the Window menu in the menu bar and selecting Layers.
For learning purpose, let’s divide the panel in three parts, the top header section, the middle section and the bottom section. In this tutorial, we will look at the middle section that reflects one open layer as of now.
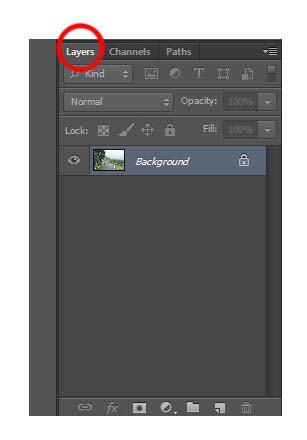
The name tab on the top that reads “Layers” tells us that we are currently looking at our Layers Panel. There are two more tabs next to Layers, named as Channels and Paths. Don’t worry about those two as of now; we will look at those in details in a later tutorial.
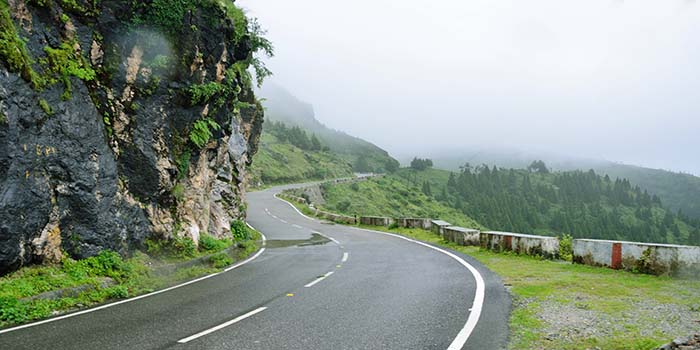
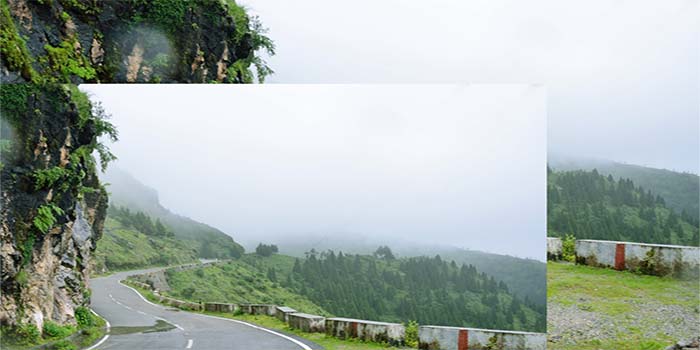
I currently have this image open in Photoshop.
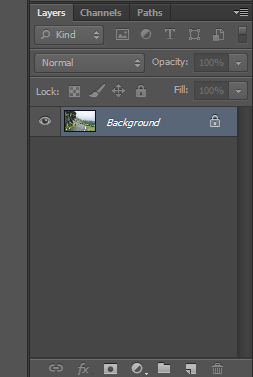
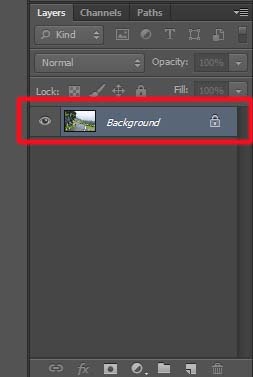
My Layers Panel currently shows one layer named “Background”. The image that I have opened lies on this layer.
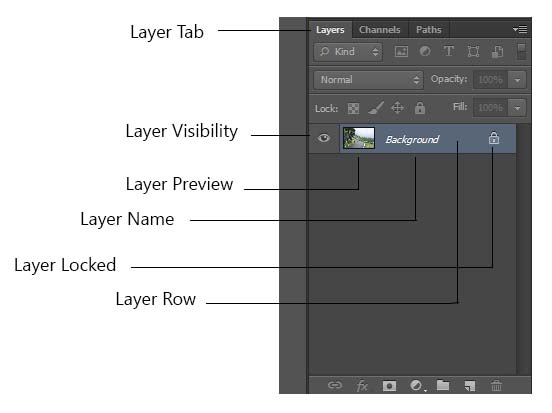
This part of the layers panel is called the layer row. Since I have just one image open, Photoshop displays just one layer. Every image that I open will be displayed here on its own row, displaying information about that image. If I added more layers to the image, the new layer will also be displayed in a separate row.
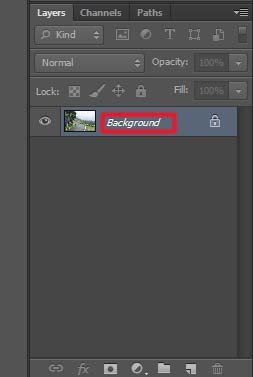
When we open an image, Photoshop by default puts it on a layer naming it as the background because that particular layer serves as the background for our document. If we add any more layers to that document, they will be called as “Layer 1” or “Layer 2” and so on but the first layer is always named as “Background” by default. All this names are editable and you can rename them to whatever you like.
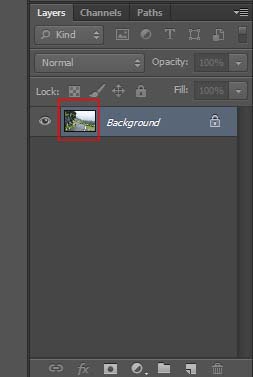
The preview thumbnail, as highlighted in the image below, gives us a small preview of what is on that specific layer. Because my image currently is the background layer, it is giving me a preview of the image open.
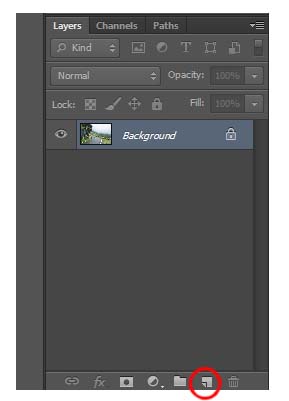
Let us try adding a new layer to our current document. Click on the new layer icon at the bottom of Layers Panel.
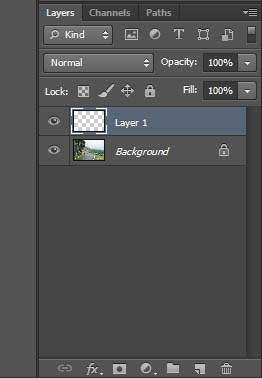
Photoshop will add directly above our background layer naming it as Layer 1. As I mentioned above, each time a new layer gets added, it gets its own row in the Layer panel.
You will notice that the preview area shows a checkerboard pattern for the new layer. Do not worry, there is no such actual pattern on this layer. It is just Photoshop’s way of telling us that the layer is blank as of now. As we work on this layer, the preview thumbnail will change to whatever changes we made on the layer.
If I clicked again on the New Layer icon, Photoshop will add another blank layer on top of Layer 1 and will name it to Layer 2.
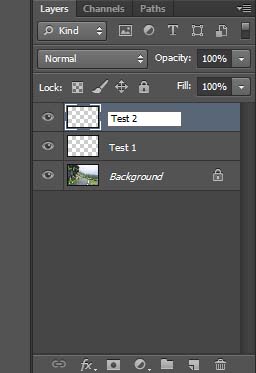
You can ignore the names when you just have a couple of layers to manage but imagine if you were working and managing 20 or more layers than it would really become confusing to remember what changes you made on which layer. In order to manage it better, Photoshop gives us the option to renaming the layer to our own convenience or preference. In order to change the name of a layer, double click directly over the name of layer to turn it into an editable field, type in the name that you want to give and press Enter.
Another way to manage our layers better is by grouping them. In layman terms, we can create a folder or group and put our layers that have a similar kind of adjustment or effect into that group, helping us to organize better while we are working on a multi-layered document. There are two way to group the layers. Either first create a group and drag the layers into it or select all the layers you need to group and then create it. Let’s take a look at both the ways.
In order to create a group, click on the “Create a new group” icon at the bottom of the Layers panel.
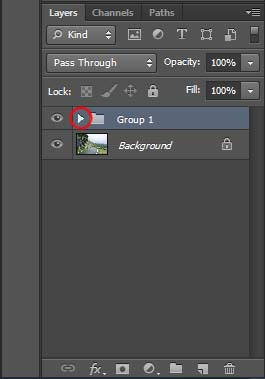
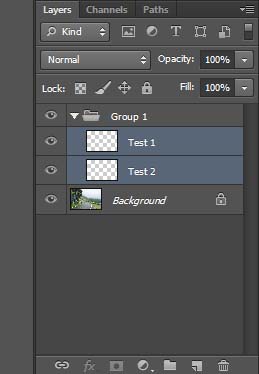
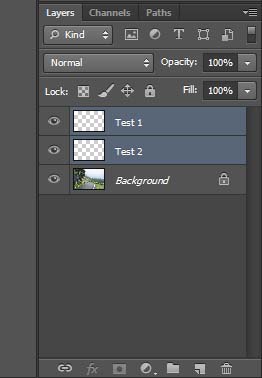
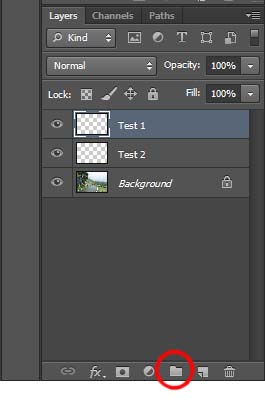 Photoshop by default will create the group on top of the last active layer. In my case, since “Test 1” layer was highlighted, Group was created above it. To put the two layers in the group, I will first click on Test 1, hold the shift key down and then click on Test 2, thus selecting both the layers and then drag them both together into the folder icon. Make sure you let the shift key go before you start to drag. Photoshop will then put both my layers inside the folder icon.
If I click on the small triangle highlighted in the image above, I can see both my layers within the group.
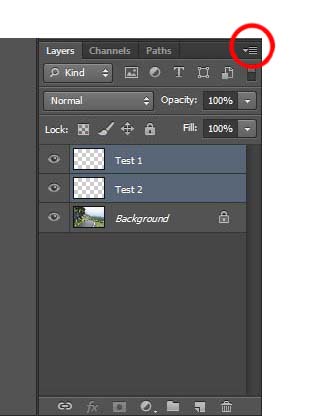
Another way is to group the layers is first select both the layers by first clicking on one and then clicking on the others while pressing the shift key down. Then click on the Panel Options icon once.
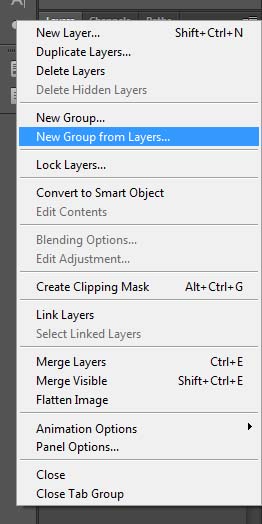
And select “New Group from Layers”.
Photoshop will open a dialog box asking you to name the group. By default the name of the group field will be populated with Group 1. Change the name if you wish to or leave it as Group one and click on OK to close the dialog box. Both of your layers will be moved inside the group.
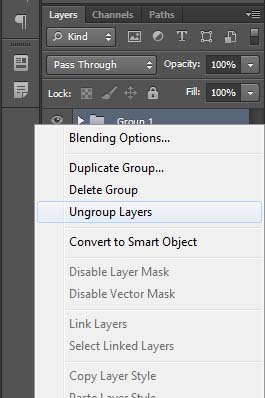
To move the layers out of the folder or to Ungroup them, right click on the folder icon and select “Ungroup Layers”
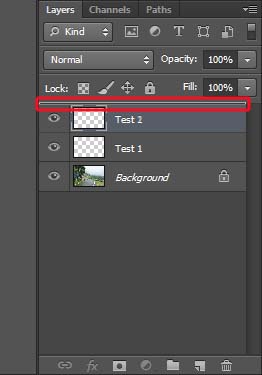
The order of the layer currently is the one they were created in. Background Layer is at the bottom since it was the first one that Photoshop created when we opened the image, Test 1 is the second layer we created manually and it is on top of Background, Test 2 is the last created layer on top of both the layers. If we want to change this order, we can do so by dragging the layers up and down. Bring you cursor on top of the layer that you want to move, press and hold your mouse button and drag the layer till a highlight bar appears and release the mouse button.
The highlight bar shows the spot where the layer will be moved. When you release your mouse button, the layer that you were dragging will be placed at the new location.
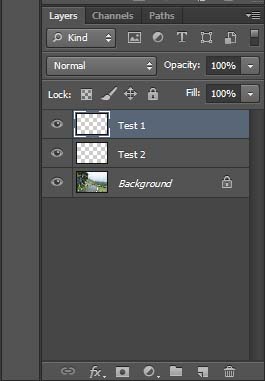
Notice how the top layer in the image above is highlighted in a blue color? This shows that the highlighted layer is the one that is currently active and any change that I make will be on this layer. When we add a new layer, the highlight will by default change to the last added layer. In order to change and make one of the other layers active, simply click on it once.
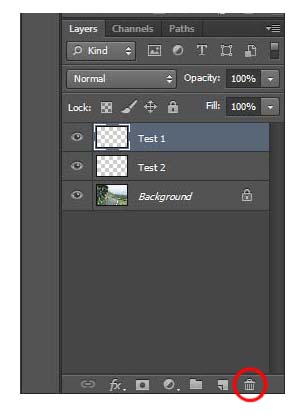
In order to delete a layer, one way is to right click on the layer that you want to delete and click on “Delete Layer” in the fly menu. Other way is to highlight the layer that you want to delete by clicking on it once and then click on the “Delete Layer” icon at the bottom right hand corner of the screen. You can also delete the layer by highlighting it and then pressing the Delete key on your keyboard.
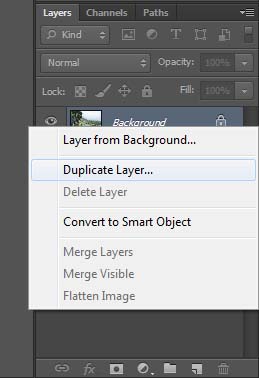
If you want to make a duplicate copy of any of the layers, you can do so by right clicking on the layer you want to create a copy of and clicking on “Duplicate Layer” from the fly menu. Another way to do it is to first highlight the layer you want to duplicate and then press “Ctrl + J” on your keyboard.
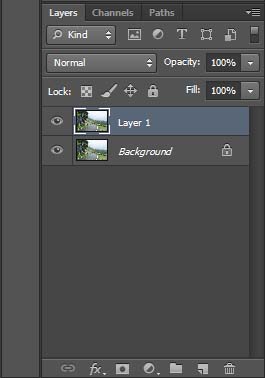
In my case, I made a copy of my Background layer and Photoshop automatically named it as Layer 1. If I want to rename it, I can do so by double clicking on it.
The next thing we are going to look at is the Layer visibility icon.
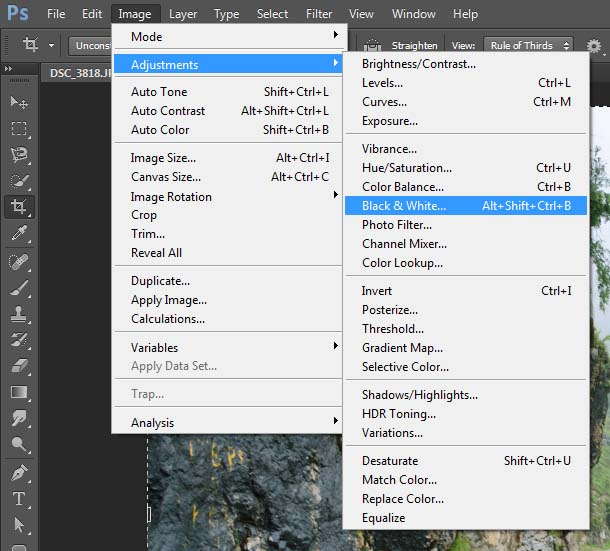
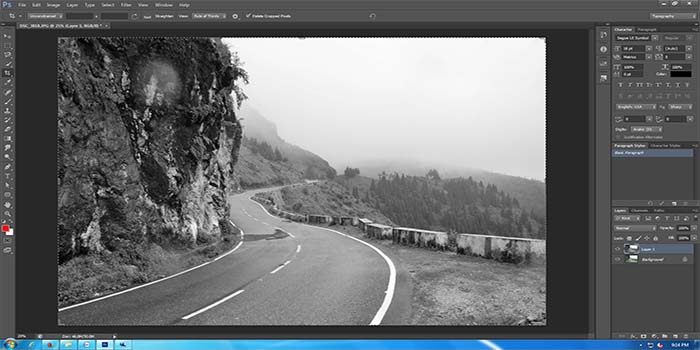
I currently have my Background Layer and a duplicate copy of it in my Layers Panel. I will make a slight adjustment and will convert my Duplicate into a Black and White image. To do so, I will first highlight it by clicking on it and then go to Image menu in the menu bar at top of my screen. I will then hover my cursor over Adjustments till a new fly menu appears in which I will click on Black and White.
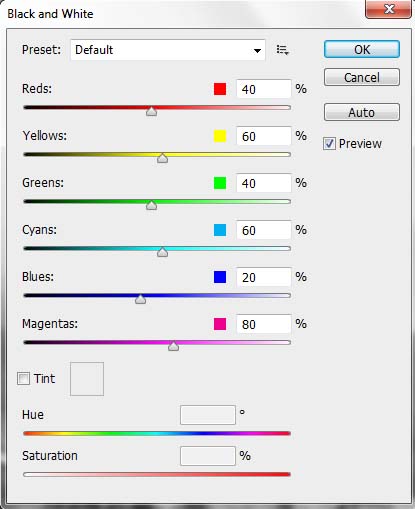
A Black and White dialog box will appear. I will not make any changes to it and click on OK. This will convert my image to Black and White.
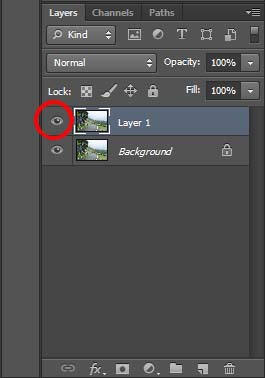
Now I have two layers open in my Layers Panel. At the first look, it seems my image has been converted to black and white but the fact is that my original image is still colored; it is only the duplicate copy that I created that is now in Black and White format. Since it is on top of my background layer, that is the reason why I can only see the black and white layer and not the colored one.
If I clicked on my Layer Visibility Icon now, it will turn off the visibility of the background Layer and I will once again have the colored image on my screen. If I clicked on it again, the Black and White layer’s visibility will again be turned on. This is the purpose of the visibility icon. It helps me to turn a layer on and off temporarily. The layer will still be there, all the changes will still be there, I just wouldn’t see it until I turn the visibility on again.
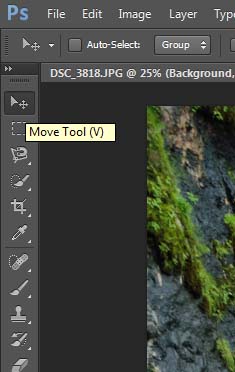
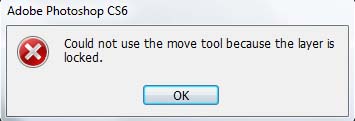
You will notice a Lock icon in front of your background layer. This icon indicates that the layer is locked and you cannot move its contents. To understand better, highlight your background layer, select the move tool from Tools Panel, click on the image and try dragging it. Photoshop will throw a pop up telling you that the contents cannot be moved as the layer is locked.
Now highlight Layer 1 by clicking on it and using the move tool, click on the image and try dragging it. You will notice that the contents of Layer 1 will begin to move and the Background Layer will appear in the background.
And this is it. These are the options that we have available in the middle section of the Layers Panel. In the next tutorial, we will take a look at the bottom section.
If you have any questions or had trouble understanding any of what I explained above, please feel free to post a comment and ask. If you feel there should be something else included in this tutorial or think some of the above concepts need to be explained in more details, please comment and let me know.

