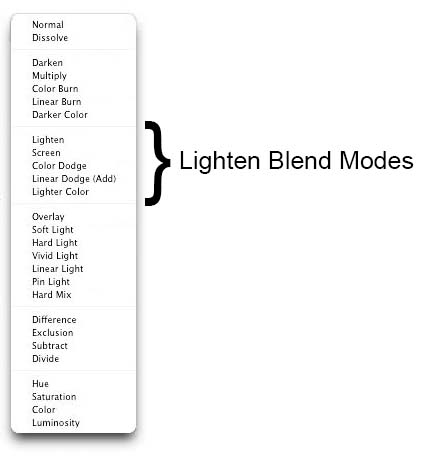
Let us do a quick recap of what we learnt in our last tutorial. So far we know that every blend mode in the Lighten category lightens or brightens the image in some way and no part of the image gets darker. We also know that these blend modes are an exact opposite of the modes listed in the Darken category. Lighten blend mode is an opposite of the darken blend mode.
We will now move on to our second blend mode from the Lighten group, Screen.
Screen is one of the most used blend modes not only from the lighten category but from the entire list of Blend modes that Photoshop has to offer. It is also often referred to as one of the must know blend modes. To understand what Screen mode does, let us first look at the official definition listed on the Photoshop help site.
“Screen looks at each channel’s color information and multiplies the inverse of the blend and base colors. The result color is always a lighter color. Screening with black leaves the color unchanged. Screening with white produces white. The effect is similar to projecting multiple photographic slides on top of each other.”
There is actually a mathematical formula that works behind how the screen mode works. Without getting into the technical terms and mathematics, let me break it down in a few simple points explaining what will happen when you apply this mode. Let us assume you have two layers in the layers panel and you changed the blend mode of upper layer to screen.
- As soon as you switch to Screen, Photoshop will blend / multiply the colors of both the layers to present a new color. However, the result color after will always be lighter in tone than the colors multiplied. The reason behind is the actual match that Photoshop performs which you do not really need to know because that would require knowledge of color codes and RGB.
- Any pure white pixels in either of the layers will remain unchanged. White is considered as the lightest color tone so bending it with any other color in order to get a lighter color, even white for that matter, will result in no change at all. So if the pixels on both layers are pure white, even then no change will occur.
- Any pure black pixel in either layer that has a pixel of a different color directly beneath or above it will get replaced. Why? Because Black is considered as the darkest color tone so when Photoshop blends it with the any other color in order to get a lighter shade, the result will be replacement of Black with the blended color. However, if the pixel on both the layers is pure Black, nothing will change because Black blended with Black remains Black; it doesn’t get any lighter or darker.
- If the colors of the pixels in the upper layer and the lower layer are exactly the same and other than black or white, color will remain the same but result will be of a slightly lighter shade.
- If the colors of the pixels in the upper layer and the lower layer are different and other than black or white, the blending will present a new color of a slightly lighter tone.
I know it all sounds like a little rocket science right now and maybe a little difficult to understand. What you really need to know is that with Screen, anything on the layer that’s pure black will disappear from view, anything that’s pure white will remain unchanged, and all other colors will blend together to give us a lighter result.
Let us understand it further with the help of a couple of examples. I have created the following two documents.
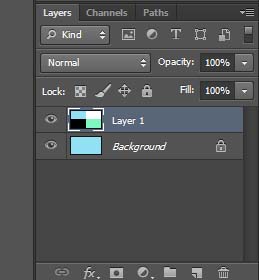
Image 1 is just a plain document filled with a light shade of blue. The second image however has four different blocks in it. The first block, starting from top left, has the exact same color as in our Image 1. Second block next to it is pure white. Third block is a pure black and the fourth block is a shade of green.
I have both these images opened on the same document. Image 1 currently sits as my background layer while Image 2 is on top of it as Layer 1. Since the blend mode as of now is normal which means no blending at all, Image 1 is completely hidden under Image 2.
If you are wondering how to do this, get these images on the same document I mean, then it is pretty easy. It is actually a simple copy paste command. I opened both the images in Photoshop, switched my view to Image 2, selected it all by pressing Ctrl + A on my keyboard, then copied it by pressing Ctrl + C. After the image was copied, I switched the view to Image 1 and pasted Image 2 on top of it.
Looking at these images and going by the theory we just discussed above, if we switched our blend mode to Screen, the color in the first block should remain the same but lighter since the pixels on both the layers are of same tone. The second block should remain unchanged because it is white. Black should completely disappear and we should get a new color of lighter shade in our fourth block.
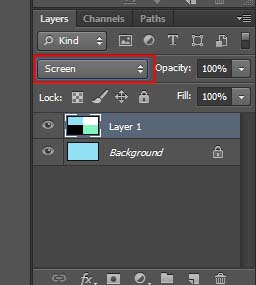
Let us change the blend mode to Screen and see what happens.
And this is the result.
This is exactly what we just discussed. Our first block changed into an even lighter shade of blue. Color remained the same but Photoshop turned it into a lighter shade. Our white is still there, not changed at all. Black is completely gone and in its place we see the exact same color that is on the layer beneath because it is of a lighter shade. Fourth block has a new color which kind of looks like the same as Block 1 but in fact is different with a slight green tint if you look closely. Another thing to notice here is that the shade of color now present in fourth block is lighter than both the colors that were blended to form the new color.
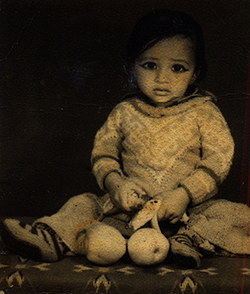
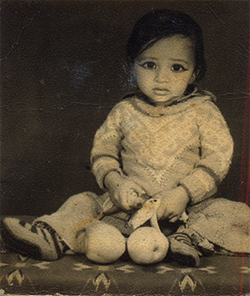
I hope this helped clarify what Screen effect mode creates on images. Now the big question here is what we can use the screen mode for and why does it come so highly recommended. Since the Screen blend mode is so good at lightening images without lightening the darkest areas (areas of pure black or close to it), one of its most common uses in photo editing, retouching and restoration is to brighten images that have had their highlights fade over time, or images that suffer from underexposure. Let us again understand with the help of an example. We will use the following image.
This is an old picture of mine that I scanned into my computer. The photograph was not in a very good condition when I scanned it and as you can see, this image has darkened a bit over the time. The contrast is missing, highlights are all gone and of course I also look like I am about to cry which actually my father tells me that I indeed was when he clicked this. Of course we cannot brighten up my mood in the photo but let us see if we can brighten up the image a little bit using the screen mode.
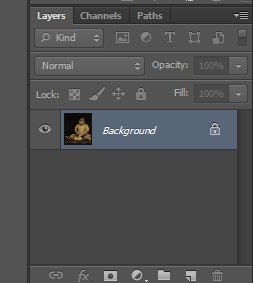
My layers panel currently has just the background layer on which this image sits.
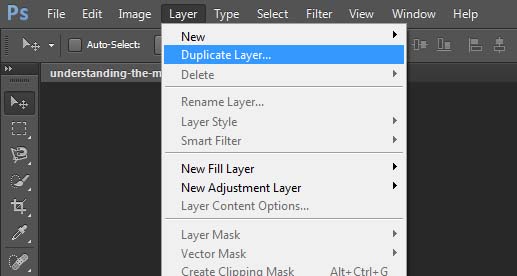
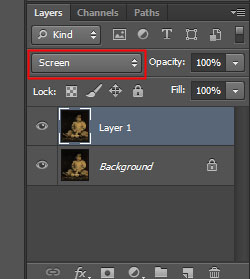
As we already know that we need to have at least two layers to use a blending mode. I will create a duplicate of my background layer and then change the blend mode of the new layer to screen. There are two ways to create a duplicate copy of an existing layer. One is to go to the layer menu at top of the screen and click on Duplicate layer.
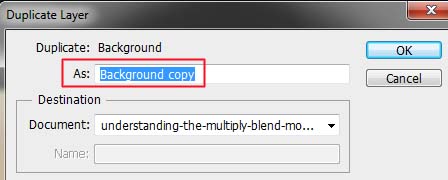
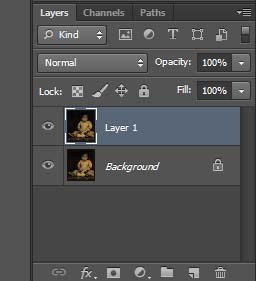
Photoshop will throw the Duplicate layer dialog box asking me to rename the layer if I want to. Since I am not really working with multiple layers right now and it is just one layer I need to add, there is really no need to rename it. I will click OK without typing in a name and Photoshop will add another layer, an exact copy of the background layer on top of it.
Another way, the quicker one, is to just press “Ctrl + J” on your keyboard and Photoshop will create a duplicate of the selected layer.
Nothing would seem to happen as the blend mode is still normal. So I will go to the blend mode field and change the blending of my duplicate layer to screen.
And here is the result. I will post both images for comparison. First one is the original image and second one is after I added a background copy and changed its mode to screen.
As you can see, it brightened up the image a bit. Highlights of the image improved a bit and the overall black shade is gone. If I wanted to brighten up the image a bit more, all I needed to do was to add another duplicate layer on top of my layer 1 and change its mode to screen as well.
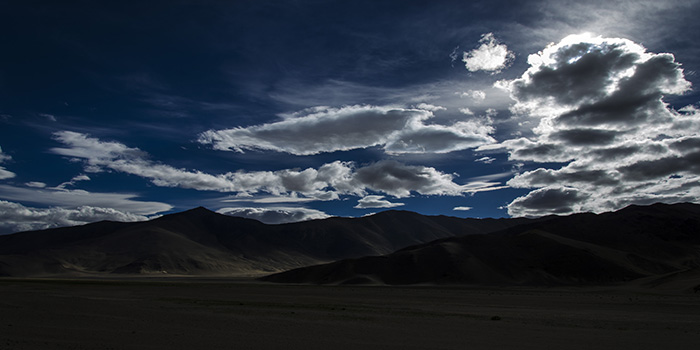
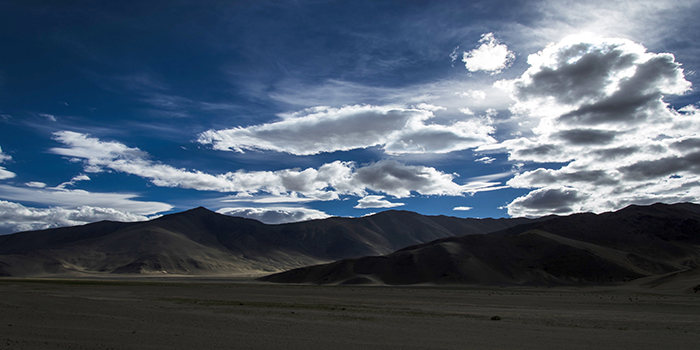
You can also use the same technique to improve images that are under expose or are missing highlights. I will post another example.
The first of these two images is the original. While the sky looks dramatic enough, the hills are under the shade and a bit too dark. In order to improve that without brightening up the sky too much, I created a duplicate layer of the original image and changed its blend mode to screen.
Another good thing to know is that Screen Blending mode is the exact opposite of Multiply mode from the darken category. While Multiply blends the colors of both layers to get a darker result, screen does the same but in order to achieve a lighter tone.
This sums up our tutorial on the screen blend mode. What I presented here are very simple examples so that even an absolute beginner can understand and follow but the use of screen mode is not limited to something this simple. One of the most creative use of Screen mode is creating double exposure images which we will learn in later tutorials.

