Ever used an Eye Dropper and seen the way it works? By Eye Dropper here, I do not mean the Eye Dropper Tool but an actual Eye Dropper. You take the small tool, put its front opening inside a liquid, press on the rubber area to suck the liquid in and then press it again to drop the liquid elsewhere, mostly in someone’s eye. This is exactly the way the Eye Dropper Tool in Photoshop works and hence the name. You use it to take sample of a color from an image or a webpage and use the exact same color elsewhere. If you are completely new to Photoshop and just starting to learn, this may sound a little confusing but there are several reasons why you would want to sample a color. If you are creating an image in Photoshop or want to fill a layer with a color that you really liked from some other image, you can select the Eye Dropper Tool, click on the specific area in the image or webpage where that specific color is and Photoshop will automatically select it as your foreground color.
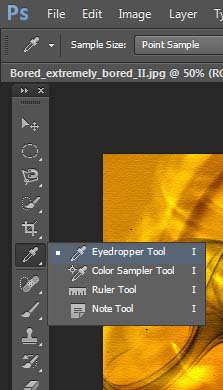
To select Eye Dropper Tool, click on its icon in the Tool panel. There are also a few other tools nested in the same box but we are looking for the one that looks like an actual Eye Dropper. To bring out the fly menu as in the picture below, either left click and hold your mouse button down for a few seconds or just right click. Keyboard short-cut for Eye Dropper Tool is “I” but it is also the shortcut for all other tools in that nest. If pressing I selected another tool, you will have to again bring out the fly menu and select Eye Dropper Tool. Another way is to press shift + I on your keyboard to go through the various tools in the nest until you see Eye Dropper tool appear in the tools panel.
Let us use the following image for the purpose of this tutorial. Suppose I want to sample a color from the Bird, all I need to do is select the Eye Dropper Tool and click on the exact spot where the color of my choice is. I clicked on the white portion in Bird’s feathers.
A circle will appear with rings of several colors and it will stay as long as you mouse button is pressed down. Let us see what it tells us.
1. The outer ring shows the neutral color which is most 50% gray.
2. The lower half of the inner ring tells me the current foreground color. Before I clicked on the image, my foreground color was Black and hence it shows Black here.
3. The upper half of the inner circle tells me the color that I clicked on. So in short, the inner circle means that my foreground will change from Black to White.
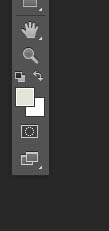
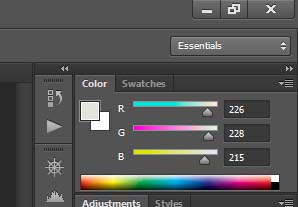
After I let my mouse button go, my foreground color will change to white with a slight creamish touch, as sampled from Bird’s feathers. Same change you will notice on the right hand side of your Photoshop screen.
There are also some advanced settings on top of your screen.
1. Sample Size: Click anywhere on the box to bring out the drop down menu. By default, Point sample is selected. It means that Photoshop will only sample the color from that one pixel that you clicked on. Other options, like 5 by 5 Average means that the tool will consider 25 pixels surrounding the pixel that you clicked on and take average of all the colors. Try changing the option and clicking on the image for better understanding and notice how your foreground color will change.
2. Sample: Again click on the box to bring out the drop down menu. Here you can select if you only want to sample the color from one layer that is currently active or would you like Photoshop to consider all the layers if you are working on a multi-layered document.
3. Show Sampling Ring: This tells Photoshop if you want to see the ring that we just discussed above. If you unchecked it, Photoshop will select the color the moment you click but you will not see the sampling ring.
Few other good to know things are,
1. If you pressed down the Alt key while you clicked with Eye Dropper Tool, Photoshop will change the background color and Foreground color will remain the same. Process however remains the same even for this selection. Press down the Alt key and repeat the above steps to work with the background color.
2. With Eye Dropper Tool selected, If you pressed the Caps Lock, the icon will change to a target. Functionality however remains the same; just the icon will change to help you with more precise color selection.
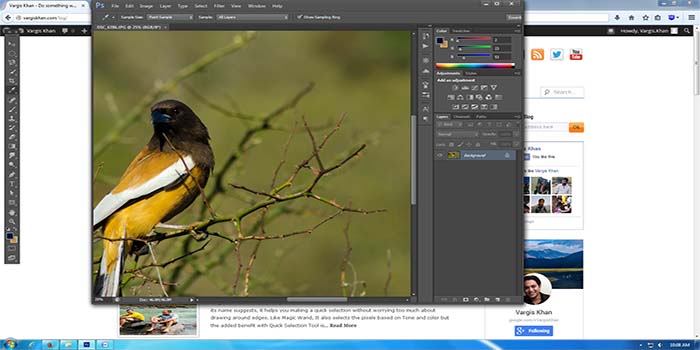
3. You can sample color from outside a document open in Photoshop. To do this, minimize Photoshop a little, select the Eye Dropper Tool, click inside Photoshop, hold the mouse button down and drag it outside to the spot where you want to select the color from. [As show in the image below]
And that is all there is to the Eye Dropper Tool.


