
In this tutorial, we will understand the second blend mode in composite category, “Saturation”.
As per the Photoshop help site, “Saturation creates a result color with the luminance and hue of the base color and the saturation of the blend color. Painting with this mode in an area with no (0) saturation (gray) causes no change.”
To understand this better, let us first know what some of the terms in the above used statement mean.
Literal meaning of the word “Hue” is a color or shade or the attribute of a color by virtue of which it is discernible as red, green, etc., and which is dependent on its dominant wavelength and independent of intensity or lightness.
Luminance literally means the intensity of light emitted from a surface per unit area in a given direction or in simple words, the brightness levels of an image.
Finally, Saturation means how deep, dark or intense the colors in an image are. Keeping this in mind, it is safe to assume that when you are applying the Saturation blending mode, you are asking Photoshop to apply the saturation of the blend color to the base image while retaining the luminance and hue of the base image. Important thing to remember here is that in area where the blend color is black, white or a shade of grey (no bright saturated colors), the base image will also be desaturated which means that the colors of your base image will also be gone. However neutral areas in the base image will not be changed by the saturation blending mode.
To understand this better, let us take a look at a couple of pictures. I have the following two images open in Photoshop.
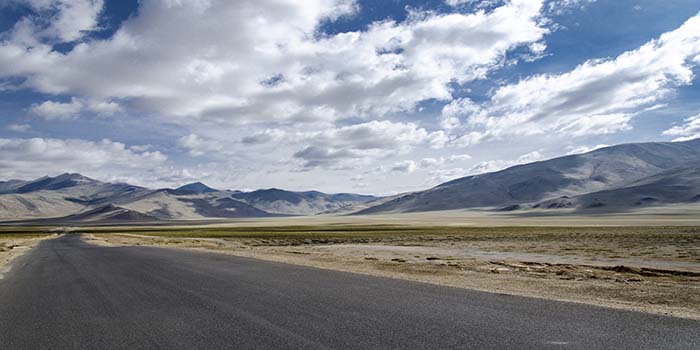

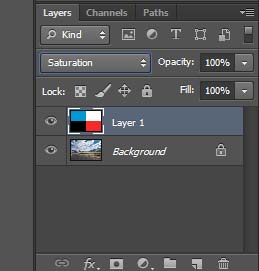
The first image is a simple photograph I clicked using my Nikon D7000. The reason why I chose this image is because the colors are not very prominent in this one. There is some grass but there are hardly any colors in it. The other image is a document that I created with four different blocks filled with four different colors. You will notice that the blue and red blocks are really saturated or in other words, very deep shades. I have both these images open in the same document in Photoshop. My image currently sits on the background layer whereas the blue document is on layer one. Blending mode right now is normal.
If you are wondering how to do this, get these images on the same document I mean, then it is pretty easy. It is actually a simple copy paste command. I opened both the images in Photoshop, switched my view to Image 2, selected it all by pressing Ctrl + A on my keyboard, then copied it by pressing Ctrl + C. After the image was copied, I switched the view to Image 1 and pasted Image 2 on top of it.
Based on what we have learned, if I now changed the blend mode of my layer 1 to saturation, Photoshop will blend both my layers keeping the saturation levels of Layer 1 while retaining the luminance and hue levels from the base image. Let us change the blend mode and see if that indeed happens.
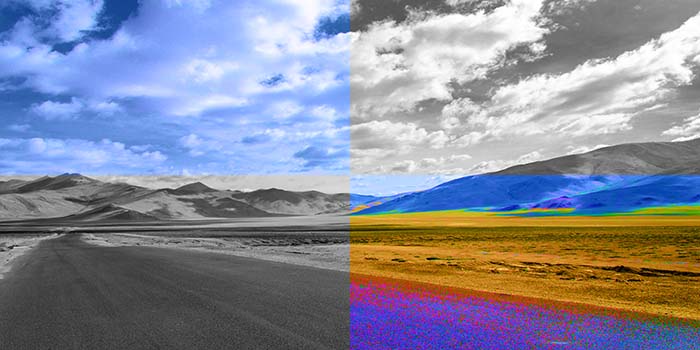
And it sure did. Notice how the saturation level of the red and blue blocks was applied on the base layer and the grass that earlier looked grey earlier is now filled with colors. The same saturation level also got applied to the some portion of the road and we see it turn purple. The blue in the sky also got saturated based on the saturation level of blue block in Layer 1. Another thing to notice here is that the overall brightness level of my image was not affected at all and the black and white blocks turned the image blue to black and white.
And that sums it up for our saturation mode. It is in fact a very one to understand. The Saturation blending mode is one way of creating the popular partial color photo effect where the focal point of an image is left in color with the rest of the photo in grayscale.
In the next tutorial, we will move on to the next blending mode, Color.