So far we have learnt until the Note tool. Before we proceed further looking at any other tool in Photoshop, we first must understand about the various blend modes available and in order to understand the blend modes, we first must learn the concept of Photoshop Layers. In this tutorial, we will define “Layers” and understand their function in Photoshop.
In theoretical terms, the term “Layer” literally means a layer even in Photoshop. When we work with layers, we put a layer on our original image and make whatever changes we had to on the layer and not directly on image. If we are satisfied with whatever enhancement, manipulation or change we made, we click the save button and Photoshop merges the layer with our original image. If we are not satisfied with our work, we can simply remove or delete the layer we created and start all over again.
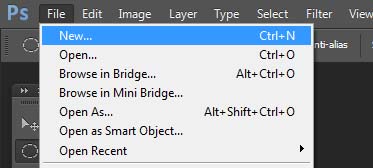
Now the big question is why work with layers at all. Before we go into that question, let us take a quick practical look first so that we can understand better. Let us start by creating a new document in Photoshop. Go the file menu at the top of the screen and hit New.
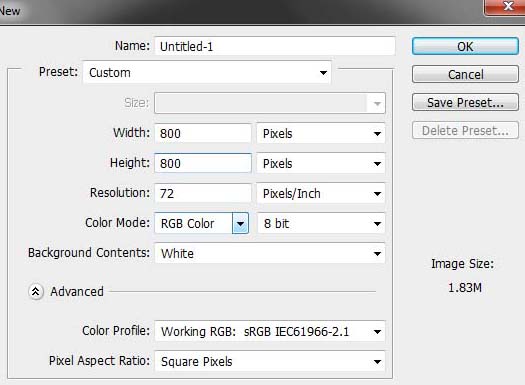
A new pop-up will appear. Enter 800 pixels for both Width and height of the new document and 600 pixels for the Height, leave resolution at 72 pixels/inch, color mode as RGB and White for background contents. There is no specific reason to these values; we just need to create a new document. You can change the numbers if you like but just so that we are both on the page, I will suggest that you keep the values to what I suggested.
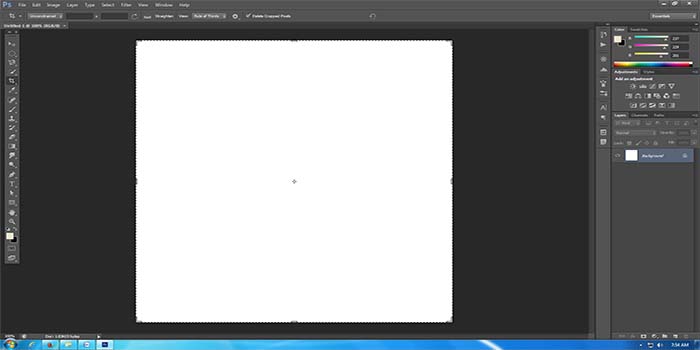
Hit OK after making these changes and Photoshop will create a new document.
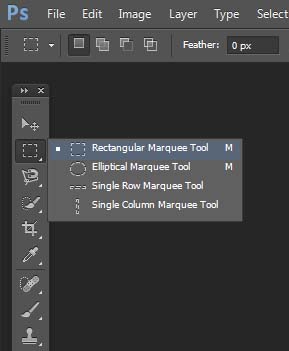
Now let us create some art work. We are of course not hoping to create something complex or a masterpiece, just some rough work to understand how Photoshop layers work. From the tools palette, select the rectangular marquee tool.
We will start by creating a rectangular shape within our document. Click on the top left hand corner of the document and drag towards right. Don’t worry about the size and shape too much. As I mentioned above, it is just some rough work.
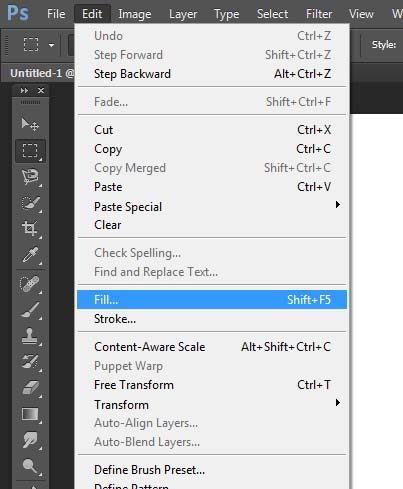
Now that we have made a selection, let us fill our box with a color. Go to Edit menu at top of the screen and click on Fill.
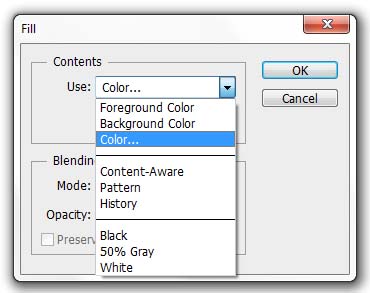
Photoshop will open the fill dialog box. Click on the “Use” option and from the drop down, select color.
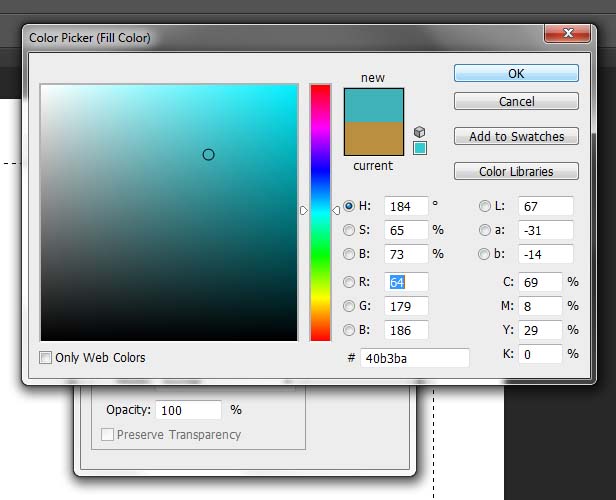
The moment you select “Color”, Photoshop will open the Color Picker so we can chose the color we want to fill our selection with. I will pick a light blue color. You do not necessarily have to do the same, pick any color that you like.
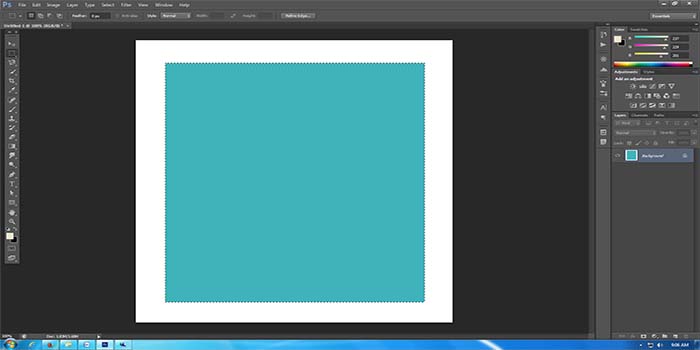
Click OK to close the color picker and OK again to close the fill dialog box. Photoshop will fill the box we created with the color we selected, which in my case was blue.
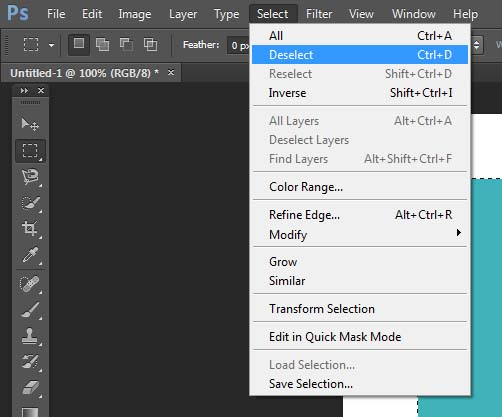
We do not need to keep the rectangular selection around our box anymore. Go to select on top of the screen and click on Deselect or just press Ctrl + D on your keyboard.
Now Photoshop will stop highlighting the selection around the box and we now have a white document with a blue box within. So far, so good. Let us continue and add some more art work.
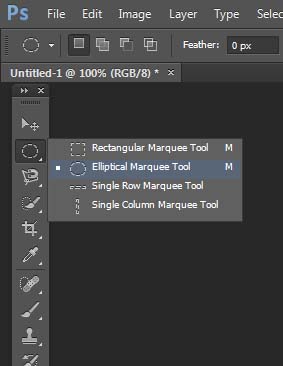
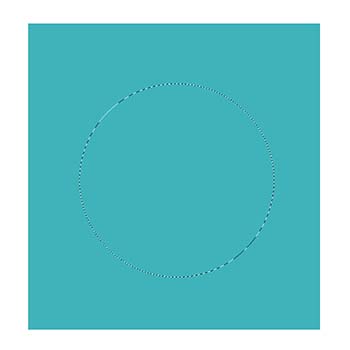
Let us create a circle within our rectangle. To do that, grab Elliptical Marquee Tool, click on the top left hand corner and drag towards right till we have a selection in the form of a circle within the rectangle.
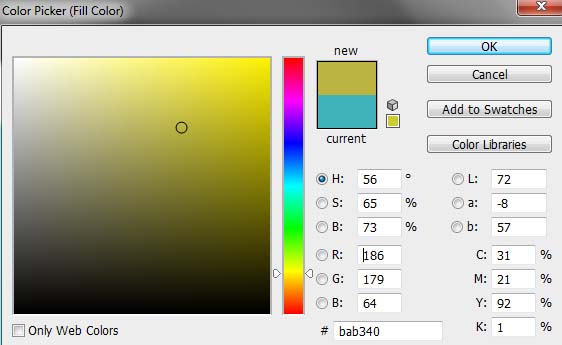
Now that we have created our circle, lets try putting a different color in it. Go to the edit menu again like we just did a moment ago, and click on fill. Photoshop will again bring out the fill dialog box. In the “Use” field, the Color will already be selected because we just used it a moment ago but do no click OK yet. If you do, Photoshop will fill our circle with the same color that we last used which is course isn’t what we want to do. In order to select a different color, click on the Use drop down and chose color once again. We will again be presented with the color picker option. This time lets chose a greenish yellow. Once again, you do not have to choose the same color that I did, you can pick any color that you want.
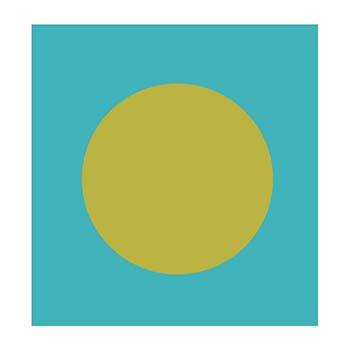
Click OK to close the color picker and OK again to close the fill dialog box. Photoshop will our circle with the color that we just chose. Go to select again and click on “Deselect” or simply press Ctrl + D on your keyboard to remove the selection around the circle and this is our artwork so far. Not so bad huh … !!
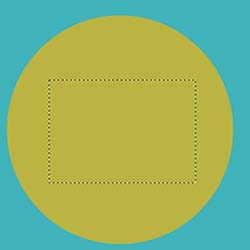
Let’s throw in some more color. Grab the rectangular marquee tool as we did in step one of this tutorial and let’s create another rectangle within our circle.
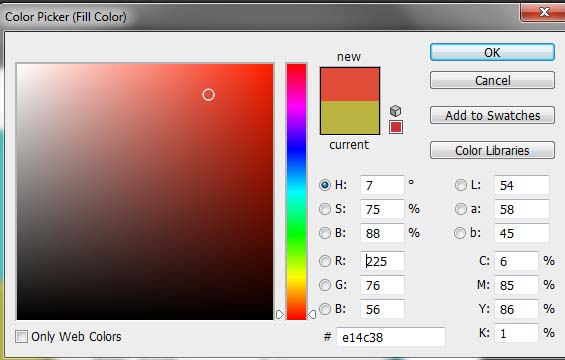
Lets again fill it with a different color. Go to Edit, select fill and chose color again from the “Use” dropdown like we did in last step. We will again be presented with the color picker. Let’s try something a little red this time.
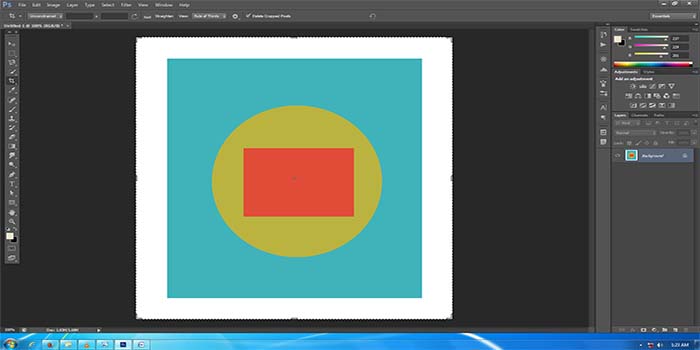
Click OK again to close the color picker and fill dialog box. Deselect the selection around the rectangle from either select menu or your keyboard and we now have a Red rectangle box within our circle. Now this is some serious award winning art.
Now let us assume for a minute that we are not happy with what we just created. Let us say that I want to change the colors, turn that greenish yellow to either complete green or just yellow. Or maybe I want to first create a circle, then a rectangle and then a circle again. Can I do it?
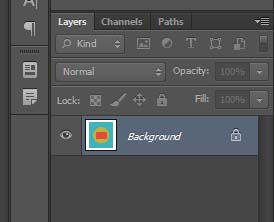
The answer is No. So far, we have just created one document and on the same layer, we kept creating our shapes and filled them with various colors. Look to the right side of your Photoshop screen under the “Layers” panel and you will notice that there is just one layer that we were working on.
Any change to this document is now not possible. If I want to change colors or draw it in a different way, I would have to start from step one and do it all over again. Now this is just one small example. If we want to do it again, we can in just a matter of minutes but imagine If this was some complex work that took us hours to complete. It would be quite a disappointment to find out that all our hard work turned out to not exactly be what we wanted and now we cannot make any changes. So far we haven’t worked with layers and this is what will happen if there was no concept of layers in Photoshop. It would make the work so much harder and sometimes miserable. That is why it is absolutely important in Photoshop that we understand and work closely with Photoshop layers. Now that we know how miserable our life in Photoshop can be without layers, let us understand how simple and interesting it gets when we have layers to play around with.
Let’s try the same thing, create the same art work but this time with layers.
Let’s start from the very beginning. Close the document you currently have open, the one we just created, without saving it. Go to File menu at the top again and click new. Once again we will create a new document with 800 for both height and width, 72 for pixels and white for background contents, just like the way we did at the beginning of this tutorial. Photoshop will create a new document for us and we are back again where we started.
Now since we will be working with layers, let us take a quick look at the Layers panel on the right side of the screen and understand some basics.
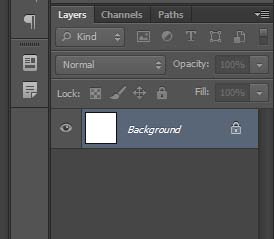
This layer panel is where we deal with layers and by deal I mean creating new layers, deleting them, moving them, merging them etc. As of now, the layers panel shows us just one layer in our document named “Background”. When we created the simple design previously, we added everything on this background layer which is why it was impossible to move the shapes independently. The rectangles and the circle were all on the same layer. The technical terms of working this way in Photoshop, on a single layer, is called “Wrong”.
Think of it this way, If you created your design on a single piece of paper, is there any way that you can move the shapes and designs? The answer is no. However, if you had a way to create designs on separate papers and merge them all together finally, it would give you the freedom to put them on top of each other in any way that you wanted. This is how the Photoshop layers system works. Let’s apply the same concept in Photoshop by creating the same design but this time creating different shapes on their own different layers.
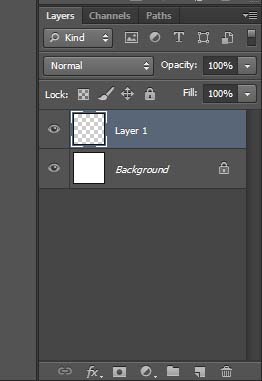
The white document we currently have open is on the background layer that we see in the layer panel. Let’s create a new layer for our first rectangle. To do this, click on the new layer icon at the bottom of the layers panel.
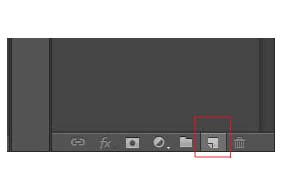 Photoshop will create a new layer on top of the background layer, automatically naming it as “Layer 1”. In the preview panel, you will notice that it is filled with checkerboard pattern but do not worry. There is no such design on the layer; it is just Photoshop’s way of telling us that the layer is blank.
You will also notice that “Layer 1” is currently highlighted or selected in the layers panel. This means that it is currently the active layer and this is also how we shuffle between layers. If we want to switch over from one layer to another, we just need to click on it and Photoshop will highlight it as the active layer. For now, we will leave the selection on “Layer 1” and make our first selection which is the rectangle box.
Select the rectangular marquee tool just as we did before, click on the top left hand corner of the document and drag towards right hand bottom corner.
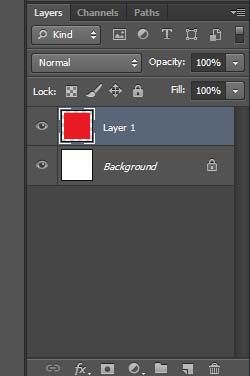
We will again fill this box with a color of our choice. Go to the edit menu at top of the screen and chose fill. When the fill dialog box appears, change the use option to color and then select a color for the rectangle from the color picker. I will choose a red color this time. You can pick any color as per your choice. Click OK to close out of the Color Picker, then click OK to close out of the Fill dialog box. Photoshop will fill the rectangle box with our chosen color. Go to select and click or deselect again to get rid of the selection outline from around the rectangle or press Ctrl + D again from your keyboard. I am just giving an overview of these steps quickly because they are the same as we did the last time.
A quick look at our layers panel and we now have our background layer still filled with solid white on red rectangle on Layer 1, completely separate from the white background.
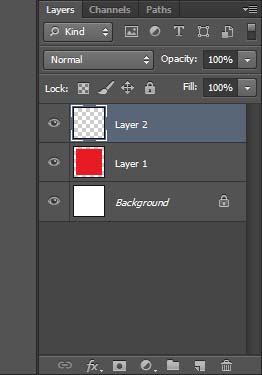
Let’s add another layer for our circle. Click on the New Layer Icon again just as we did the last time and Photoshop will add another layer on top of Layer 1, automatically naming it as Layer 2. As a default action, Photoshop always places the new layer on top of the last active layer.
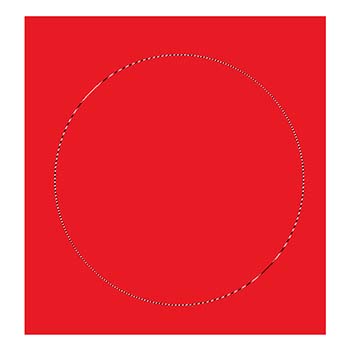
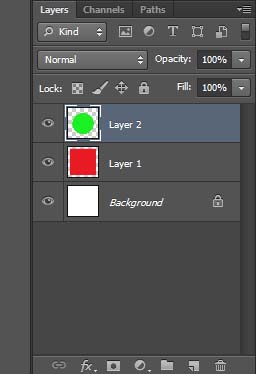
Layer 2 is now the active layer and this is the layer that we will draw our circle on. Just like Layer 1, even Layer 2 is completely separate from our first 2 layers. Grab the Elliptical Marquee Tool, click at top left hand corner within the red box and drag towards the right hand bottom corner to draw the circle.
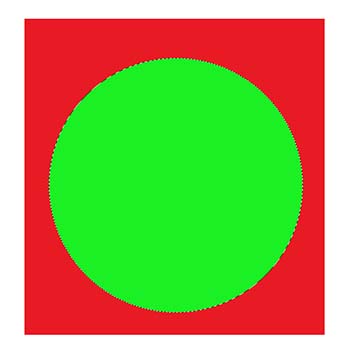
Once again go to Edit > Fill, re-select Color for the Use option to open the Color Picker, choose a different color (I’ll choose green), then click OK to close out of the Color Picker and OK to close out of the Fill dialog box. Photoshop fills the selection with the color. Go to Select > Deselect to remove the selection outline from around the shape. When you’re done, your second rectangle should appear filled with color in the document.
A quick look at the Layers panel and we now have three layers, background is white, and our rectangle is on Layer 1 and Circle on Layer 2.
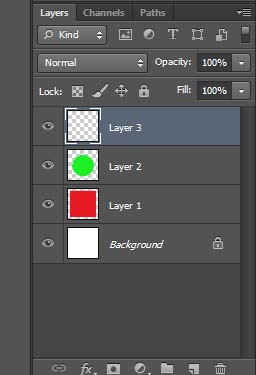
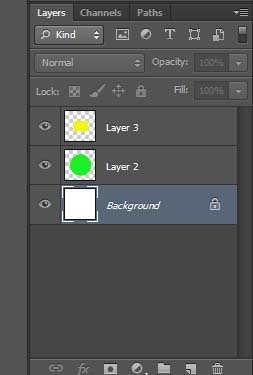
Now let’s add our last rectangle. Once again click on the new layer Icon and Photoshop will add another layer at the top naming it to Layer 3.
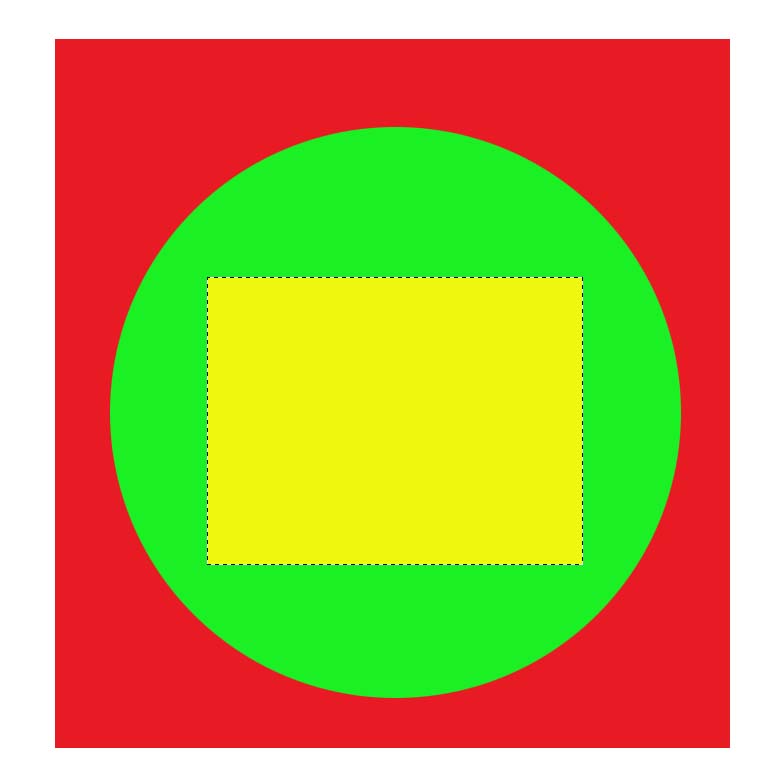
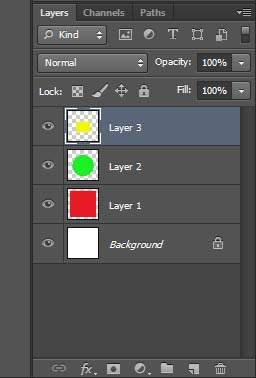
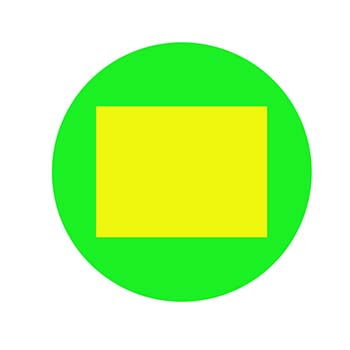
Select the rectangular Marquee tool again and draw a rectangle within our circle. Then repeat the same steps as we did before to fill it with another color. I will choose Yellow this time. Remove the selection by pressing Ctrl + D and we now have our Yellow rectangle within the green circle.
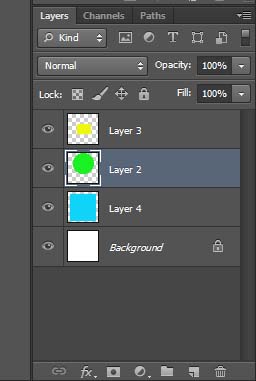
Layers panel will have four layers now, Background, Layer 1, 2 and 3.
We have now created the same art work that we earlier did but this time using the Photoshop Layers system. If I want to save it now, all I need to do is press Ctrl + S from keyboard or click Save from File menu at the top and Photoshop will merge all these layers into a single document and save it. Now let us understand how working with Layers helps us. Previously, we stacked all our drawing on top of each other on the same layer making it impossible for us to make any changes later on. We were actually drawing on top of the previous drawing, hence removing the previous pixels with our new shape and new color. But with four different layers now, all our shapes and colors are now on different layers, or let’s say for different sheets of paper, which means that we can easily make any edit that we like.
Photoshop shows the layers in Layer panel in the exact order as they are stacked. In a way you’re looking at the layers from top to bottom in the Layers panel that you’re looking down through the layers in the document. Any layer above another layer in the Layers panel appears in front of it in the document. If the contents of two layers overlap each other in the document, as our shapes are doing, whichever layer is below the other in the Layers panel will appear behind the other layer in the document. Above = in front, below = behind. It may take a while for your mind to grasp it, but it’s really that simple.
Now let us see how we can make our edits. For example, Let us say that I want to get rid of that first red rectangle because I think its too bright. To do that, click on Layer 1 in the Layers panel and hit delete on your keyboard. You can also right click on the layer and click on “Delete Layer” Once we do this, Layer 1 will be removed the Layer Panel and the red rectangle from our art work.
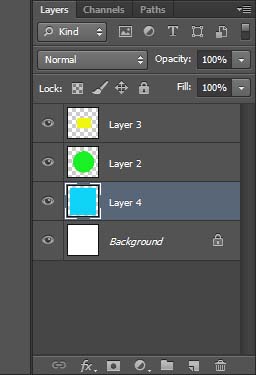
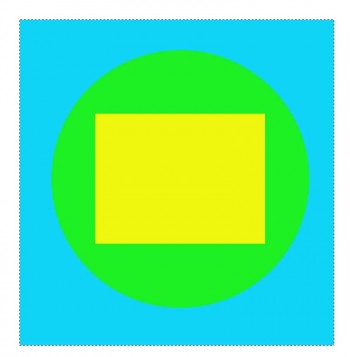
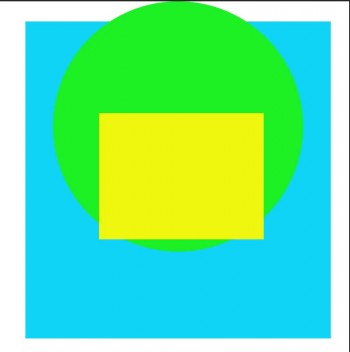
What If I decide to bring the rectangle back but this time with a different color. To do that, first select the background layer as active layer and then click on the “New Layer” icon in your Layers panel. You will notice that Photoshop will add a new Layer on top of the Background layer but beneath the Layer 2. This time it will name as Layer 4. Once again, grab the rectangular marquee tool and draw your rectangle. Make sure Layer 4 is active while you make your selection. For a moment, you will think that you are drawing on top of our circle but do not worry. As long as Layer 4 is active, our rectangle will be under the circle. Once the selection is made, fill it with any color using the same steps as we did previously, this time I chose Blue.
Let us say I want to reposition our circle to a different place. To do that, click on Layer 2 in Layers panel because our circle is on it, then make sure Move tool is selected from the tools palette, click on the circle in our art work and reposition it to wherever you like.
If I want to save this work as it is for now and continue working on it later, I can simply save it as a Photoshop PSD file which means that the layers would still be kept separate the next time I open the PSD file.
This was just a basic introduction to the concept of Layers for anyone who is just beginning to learn Photoshop. The list of what you can do with Layers is endless. These were just two very simple examples that I showed for a beginners’ understanding on how you can add layers and make some very basic edits. As we go through the later tutorials, we will learn more on how to work with Layers. Some other reasons why you should work with layers, just for your knowledge for now are,
- No damage to your original photo.
- Work is done on top of or on copies of that photo.
- Gives more control.
- Use blending modes to change the way layers interact.
- Can change the opacity of any effects.
- Work with layer masks so that you can work selectively on your photo with any adjustments.
In our next tutorial, we will study and understand the Layers Panel more closely because that is where you make most of the changes to your Photoshop Layers. For now, you have learnt what Layers are, how to add a new layer and most importantly why you should work through layers. In the later tutorials, we will see how we use the Layers Panel to manage and manipulate layers to retouch or add effects to our image.
If you have any questions or suggestions, please feel free to comment.

