This Tutorial is for Photoshop CS6 or later versions of Photoshop. If you are using an earlier version, some features may be missing.
Crop Tool is used to trim portions of an image that you do not want to keep. You may want to do this for several reasons, to reduce the size of an image, to take out portions that you do not like or to simply keep the focus on a specific area of the image. Keep in mind though that with Crop Tool you can only trim an image from the sides. If you want to cut out a portion of the image from the center, for example to cut out an object from an image, you cannot do it using the Crop Tool [sounds obvious I know, but someone asked me this question so I thought to mention it].
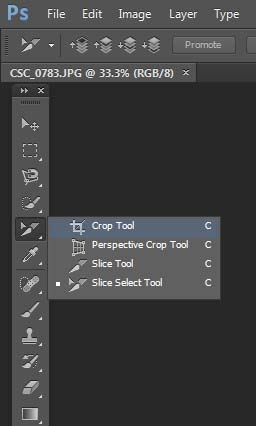
To select the crop tool, simply click on its icon in the tools palette. There are a few other tools nested in the same box and Photoshop puts the last used tool in the palette. If you do not see the crop tool in the palette, then click on the fourth box from the top and hold for a couple of seconds for a fly menu to appear from which you can select the crop tool. You can also right click on the box for the fly menu to appear. Keyboard shortcut for selecting the Crop Tool is “C” but it is also the shortcut for all the tools nested in that box. If pressing C selects some other tool from the group, you will again have to select Crop Tool using your mouse as I mentioned above.
There are several things that you can do using the Crop Tool except for cropping down an image. Let’s take a look at these features one by one.
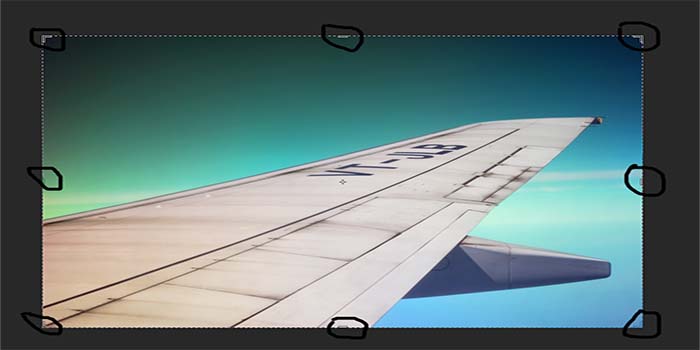
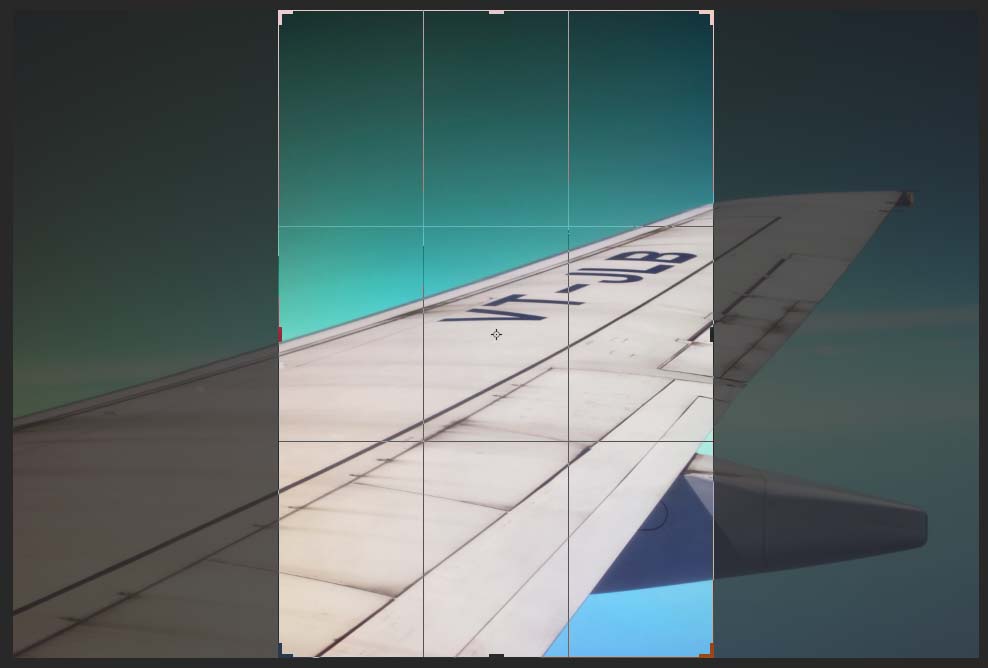
The moment you select the Crop Tool, you will notice that Photoshop puts a frame kind of outline around the image with 6 selection points as shown in the image below. These are the Crop handles that you will use for trimming down the image.
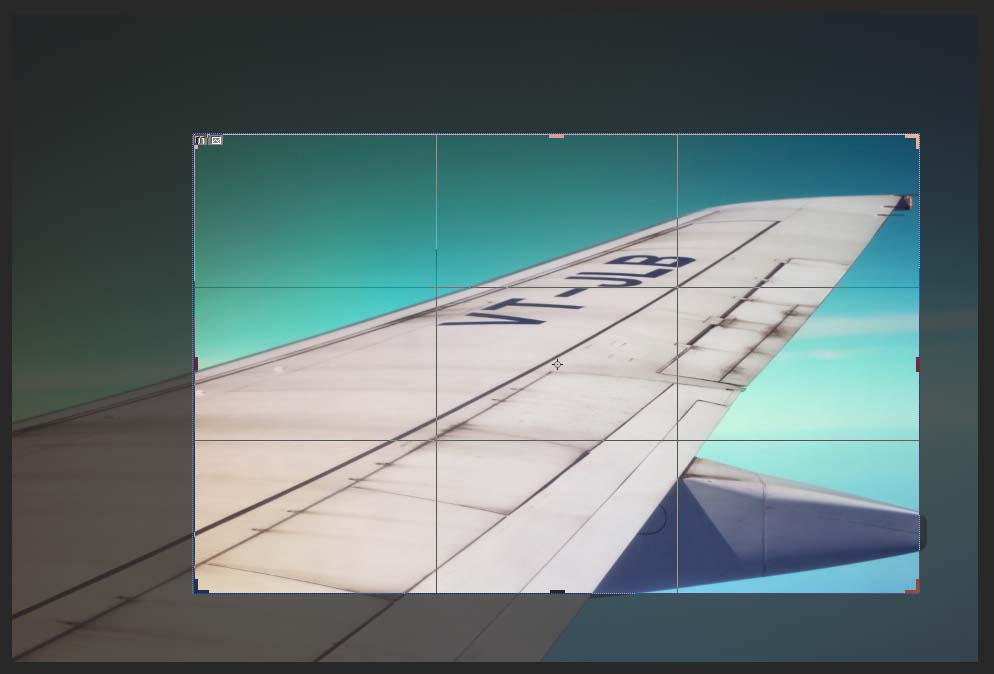
Click on any of these handles, hold the mouse button down and drag to resize and reshape the crop box. You will notice that as you change the size of the box, portion outside of it will look a little faded. The bright portion inside the box is the one that will stay and the faded portion outside the box will be cropped out.
Keep in mind that you do not necessarily have to click only on the crop handles. This is just something that Photoshop added for convenience. The four handles on the corner of course mark the corners of an image and the ones on the sides mark the absolute center of that side. You can however click anywhere on the edge of the image and crop.
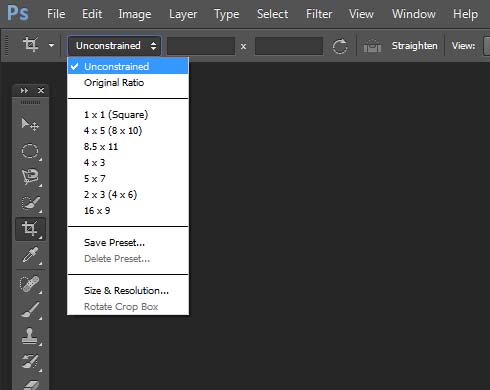
Quite often, you would want to use a standard frame size to crop an image. You can do this using the Crop Tool Presets located in the options bar on top of your screen.
Select any of the frame size from the drop down and you will notice that Photoshop will automatically crop the image. You would not need to manually do anything. This is quite a handy tool that can save a lot of hassle and time if you already know the frame size that you want to crop the image into.
If the aspect ratio that you are looking for is not in the preset list, you can create your own customer aspect ratio or frame size by entering the value in the two boxes provided in the options bar.
If you want to quickly crop a landscape image to portrait, in other words crop it from horizontal to vertical or vice versa, you can do this by clicking on the rotate icon in the options bar [the arrow icon in the shape of a circle].
The moment I click on the rotate icon, Photoshop quickly cropped my image from landscape to portrait.
Let us say that you made a cropping selection but later decide to change it. Photoshop gives you the ability to move the crop box around rather than making the crop selection again. In order to reposition the crop box, just click inside it and move it around to the new desired position.
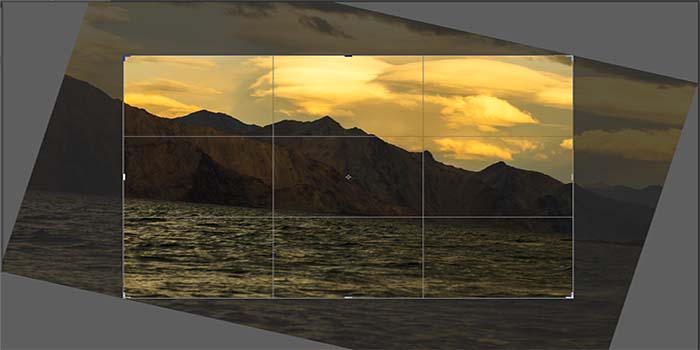
Next option in the Options Bar is related to straightening an image. It means that if you took a picture only to find later that you were holding the camera in a slightly tilted position which resulted in a tilted horizon, you can straighten it using the Crop Tool. There are a couple of ways to do it. One way is to select the Crop Tool, bring you cursor to one of the corner handles and rotate the image until to a straight position. You will notice that as soon as your move is near one of the corner handles, it will change to a curved arrow. This is when the functionality the rotate the image becomes available.
Another way (not that effective though) is to let Photoshop do the task. Go to your options Bar and click on the “Straighten” option, find something in your image that should be straight like the horizon point and then draw a straight line. As soon as you release the mouse button, Photoshop will make adjustments to the image the straighten it. This however is not really that effective and barely makes any difference to an image that is highly tilted, like the one I used in the example above. Best way in my opinion to straighten an image using the Crop Tool is to do it manually.
Right next Straighten in the Option Bar is the option to change the view or overlay of the Crop Box. It related to the three line grid that you see inside the Crop Box. You can select any of the multiple choices from the drop down to change the line pattern inside the Crop Box.
And that pretty much is. These are some of the facts that can get you familiarized with the Crop Tool as a beginner. This is just the basic knowledge, the best way of course to learn more is to open an image and play around with it using the Crop Tool and I am sure you will come across and learn many new things that I haven’t covered here.

