In our tutorials so far, we covered the solid color adjustment layer which is listed first in the adjustment layers list. We then moved on to understanding opacity and blending modes because I felt it was necessary to know these features beforehand to understand adjustment layers better. Since we have now covered both the Opacity and Blend modes, let us move back to learning the various types of adjustment layers. In this tutorial, we will learn about Photoshop Gradient adjustment layer. Please note that this tutorial is for Photoshop CS6 or later versions. If you are using an earlier version of Photoshop, some features maybe missing or different.
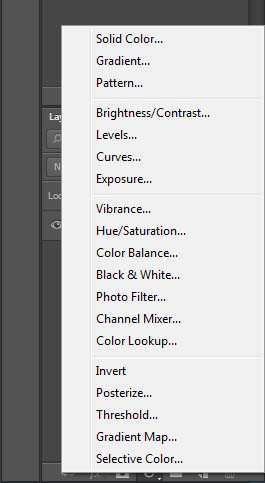
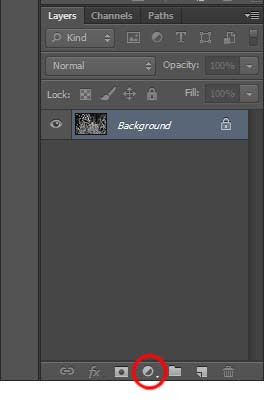
Let us first understand what the word Gradient means. As a noun, Gradient literally means “an inclined part of a road or railway or in simple words, a slope”. In Physics, Gradient stands for “an increase or decrease in the magnitude of a property (e.g. temperature, pressure, or concentration) observed in passing from one point or moment to another.” I think both these definitions are relevant to its usage in Photoshop. In the image above, you will notice that the Gradient adjustment layer is grouped together with two more layers, solid color which we have covered in our previous tutorial and Pattern which we will take a look at in a later tutorial. The reason these three are grouped together because there functions are pretty much the same. The solid color adjustment layer fills a document with any color of our choice and the gradient layer also does the same. The difference however is that when we use the Gradient adjustment Layer, the intensity and shades of the color differ from one point to another in the same document. How? Let us understand with the help of an example.
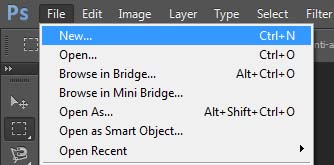
Let us create a new document in Photoshop. Go File menu at the top and click on New.
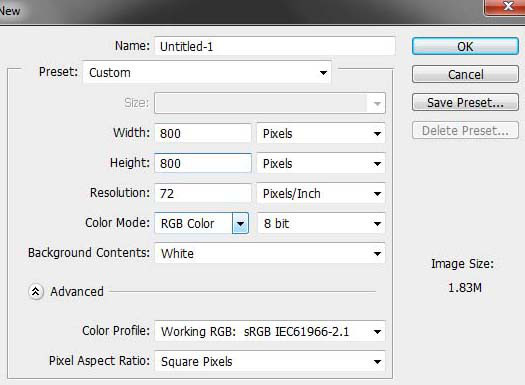
You will be presented with a dialog box asking you to mention the dimensions of the document that you would like to create along with a few other settings. I will use 800 pixels for height and width, 72 pixels/inch for resolution, color mode as RGB and background contents as White. There is no specific reason to why we are using these settings. We just need a blank document as of now. So that we are both on the same page, I suggest that you follow the same settings. You can change the height and width if you like but leave the rest same to what I suggested.
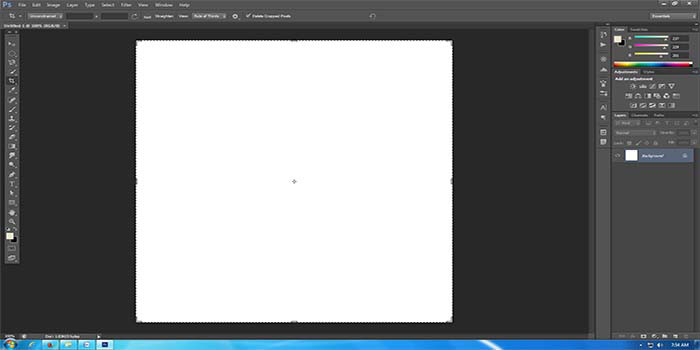
Photoshop will create a new document for you.
Now let us add a new gradient adjustment layer. Click on create a new adjustment layer icon in the layers panel and select gradient from the fly menu.
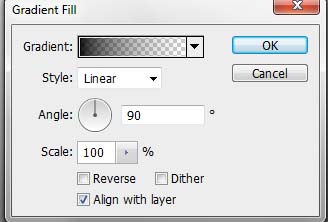
Photoshop will open the Gradient fill dialog box for you.
The important thing to notice here is that the moment the gradient fill box appears, you will notice that Photoshop has filled your white document with a shade. As in my case, the shades are pure black at the bottom and then it slowly starts to transition to white as it moves towards the top. Top part of the document is pure white.
This is what the gradient adjustment layer exactly does. It fills your document with a color of your choice but the fun part is that you can select different shades of color in the same document. How? You do that by making your selections in the Gradient Fill dialog box. There is not much that you can learn about it by just reading this tutorial. It is really more of a practical learning that you will gain. I will run you through the several options that you have available in the dialog box. Read about these and start making changes in the dialog box while keeping in an eye on how every change you make will impact the gradient fill on your white document.
1. Gradient: The Gradient drop down is where you make the selection related to how you want your gradient to appear.
2. Style: Another option to change the way the gradient style. Try selecting all of them and notice how the gradient will change
3. Angle: Changes the angle of your gradient
4. Scale: Its more like changing the intensity level of the gradient

