I remember when I started to learn Photoshop, one thing that confused me the most were the blending modes. Confused is probably not the right word as I understood what it does but “How” always remained a big question. Since I did not know what effect which blend mode creates, I used to try them all one by one which of course was time consuming and at some level, annoying as well. One thing that was very clear to me though, was that the Blend modes are one of the Photoshop’s must know area because without it, it would be very hard and nearly impossible to create the desired effect while working with Layers.
Photoshop has a long list of Blend modes, 27 to be precise in Photoshop CS6, and with names like Linear Burn, Exclusion and Overlay it is sufficient to leave a person scratching their head. Before we start looking at the available Blend modes, it is important first that we understand what a Blend mode exactly is and why do we need it. For simplicity’s sake, we will not get into the technicalities and math that Photoshop uses behind these modes because you do not really need to know that. I will just keep my explanations to what change or effect can you expect from which Blend mode.
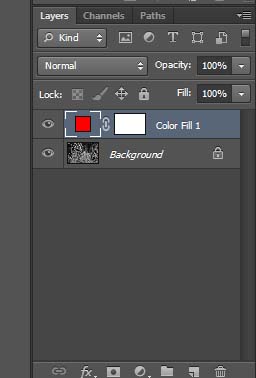
So the first question here is what? What exactly is a Blend mode? Take a look at the picture below.
In simple words, a Blend mode means or defines how the layer sitting on top will blend or interact with layer or layers below it. When we chose a blend mode, we are essentially telling Photoshop to blend our selected layer with the layer below based on whatever blend mode is selected. In the example of the above picture, when I change the blend mode, I would be telling Photoshop how I want the color fill layer to blend with my background layer. Depending on the mode we select, Pixels from the top layer will then alter the color and luminosity of those on underlying layers. Confused? Do not worry, this will get easier and start making more sense as we dig deeper.
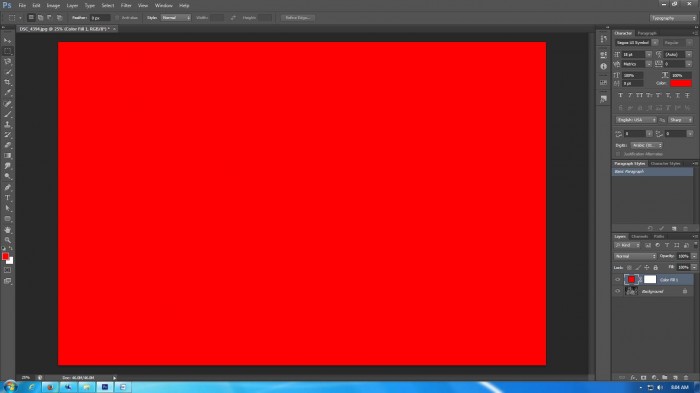
Second question after what is why? Why do we really need a Blend mode? Let us refer to another image here again.
As you can see in the image above, my top layer is completely hiding the layer beneath. In the layers panel, I have a background layer but I cannot see it as the color fill layers is completely hiding it. It is like overwriting my work on the background layer with the layer on top of it. The only way I can see my background layer is by reducing the opacity but that is like tying both my hands and asking me to paint. If I reduce the opacity or fill percentage of the top layer, it would only reduce the luminosity making it more transparent and that is pretty much it. The results would not be as desired and hardly interesting. And this is why we need a blend mode because we do not want our top layer to overwrite the layer beneath. We want it to blend, merge with the other layers and we do that by changing the blend modes.
The next question after why is how? How does a blend mode work? Our understanding of which blend mode to choose when also depends on this explanation.
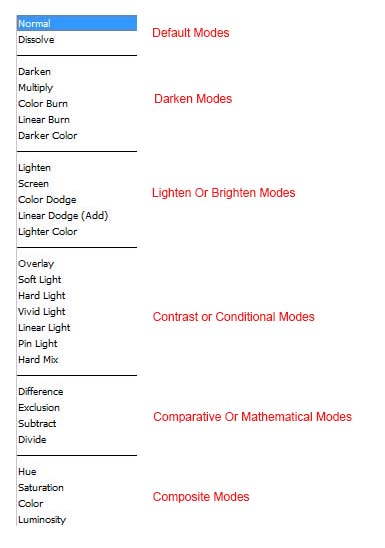
As I mentioned above, there are 27 blend modes to choose from in Photoshop CS6, a list which is bound to grow with later versions. As of Photoshop CS2, there were 23 blend modes, a number that went up to 25 with CS5 and 27 in CS6. Thankfully, these modes are categorized which means that several of them create the same kind of effect with a very minor difference. Take a look at the image below.
You will notice that even Photoshop has grouped these blend modes together. This grouping, as I mentioned above, is based on way these modes blend the layers. Each mode in the group works more or less in the same manner, though you can expect a slight change in the effect. There are only a few blend modes that you really need to know and these are the ones that you will end up using most often. Understand the one big blend mode from each group and you will know that the rest are just altered versions of it with small changes.
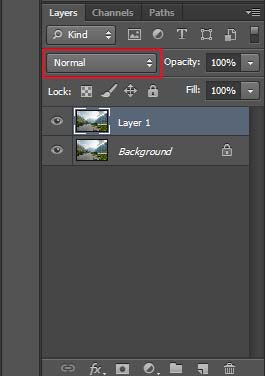
You can access the Blend modes directly from the Layers Panel. By default, when you create a new layer, the normal blend mode is selected. Keep in mind though that you must have an added layer, either a new adjustment layer or a duplicate layer of the background image in order to be able to access the Blend modes. You cannot change the Blend mode of the background layer, Photoshop won’t allow it as it treats the background layer differently from all other layers. If your Blend mode area is grayed out then either you only have a background layer in Layers panel or have the background layer as active. To access the Blend modes, you must create a new layer that you want to blend into the background layer and must have the new layer as active.
Click on the tab that reads “Normal” and a drop down list will appear with all 27 modes listed. You will notice that the list is divided in groups with “Normal” and “Dissolve” listed on the top in the first group. There are 6 groups in total and below is how the blend modes are categorized in these groups.
As I mentioned earlier in this tutorial, there is an entire mathematical calculation involved behind the way these blend modes work but you do not need to overwhelm yourself with that. To be able to use these modes efficiently, what you really need to know is,
- Default Modes: Though the first two modes, Normal and Dissolve are listed together, they actually have nothing to do with one another. The normal mode is that a new layer is set to by default and Dissolve is something that you would rarely use. We will discuss these two modes separately in later tutorials.
- Darken Modes: These modes are called such because each one of them has the effect of making an image darker.
- Lighten or Brighten Modes: These modes have the effect of lightening the image.
- Contrast Modes: As the name suggests, these modes have something to do with contrast. Each one of these modes lightens or darkens the image by boosting contrast.
- Comparative Modes: These modes work by comparing the pixels between layers.
- Composite Modes: These modes pretty much do what their names suggest. The effect is based on color and luminosity.
I know all this sounds a bit overwhelming and hard to comprehend but we will look at all these groups and the modes within in details in coming tutorials to understand them better.


