
In our last tutorial, we had our first use of the “Opacity” function available in the Layers Panel while working with the Solid Color adjustment layer. In this tutorial, let us understand what Opacity is as we will be using it quite often to understand other available adjustment layers.
The literal definition of the word Opacity is “the quality of lacking transparency or translucence” and it has the exact same function in Photoshop as well. Opacity defines that how transparent the currently selected layer would be, or in other words, how much would it allow other layers below it to show through. Let us understand with the help of an example. I have the following image open in Photoshop.

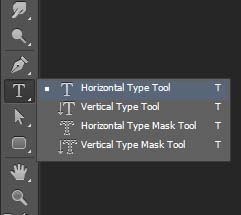
Let us not do something very complicated here and add a very simple effect so that we can understand what Opacity actually does. Let us say that I want to add some text over this image. In order to do that, I will select the Horizontal Type Tool from Tools Panel. There are three other tools nested in the same area so if some other tool is reflecting in the Tools Panel, left click and hold for a second for a fly menu to appear and select the Horizontal Type Tool. Alternatively, you can also right click on the group for the fly menu to appear.
Before we add text to our image, let us first define the font, font color and size. We can do that from the options bar at top of the Photoshop screen.

I will leave the font as Arial, nothing fancy. You may need to adjust the font size according to the size of your image and alignment of text according to your preference. Play around with the font options until you come up with a setting you like. The last black box in the image above is where you can select the font color from. After selecting the font, font style, size and alignment, click on the font color box once. This will bring out the color picker box from where we can change the Font color. I will set mine to white.

With these settings in place, let’s add some text to the image. Click anywhere on the image and type in the text you want to add.

In case you want to reposition the text after you are finished, move your cursor a bit in image till it turns into a pointer again, like the move tool. Once that happens, left click, hold your mouse key down and drag the image to the desired location. Keep in mind though that in order to move the text, the Type tool should still be active means that your cursor should still be blinking indicating that you can still edit the text. If that is not happening, click on the text again and when the cursor starts to blink, move the text field.
After you are done adding and positioning the text, let’s take a look at the Layers Panel.
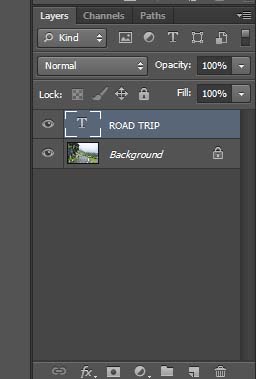
Our layers panel indicates two layers. One is our background image and the other one is the text we just typed on. Photoshop automatically renamed the second layer to what our text on the image reads. Let us see what “Opacity” can do here for us. Click on the dropdown arrow next to the percentage field and a slider will appear. Initially the small pointer on the slider would show at the extreme right and the percentage field would 100%. This means that our text layer currently has no transparency. Click on the pointer and drag it towards the left on the slider.
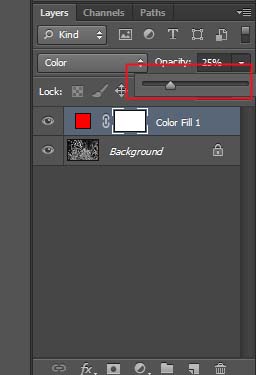
As you move the slider to the left, the percentage will start to reduce and at the same time, the text we just added in solid white color will start to become transparent. The more you drag the pointer to the left, more transparent it will become and our background image will start to become visible through the text.

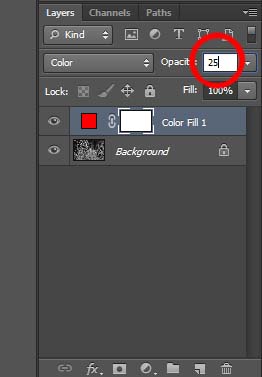
Another way to change the opacity is to directly click in the percentage field to make it editable and then type in the percentage manually.
This is what Opacity is all about. When you make a layer active by clicking on it and reduce its opacity, it starts to become transparent to make the layer beneath it more visible. This was a very simple beginner level example to make you understand what kind of impact can Opacity have on our images. In coming tutorials, as we understand other functions of Photoshop, we will explore and learn more about Opacity.